
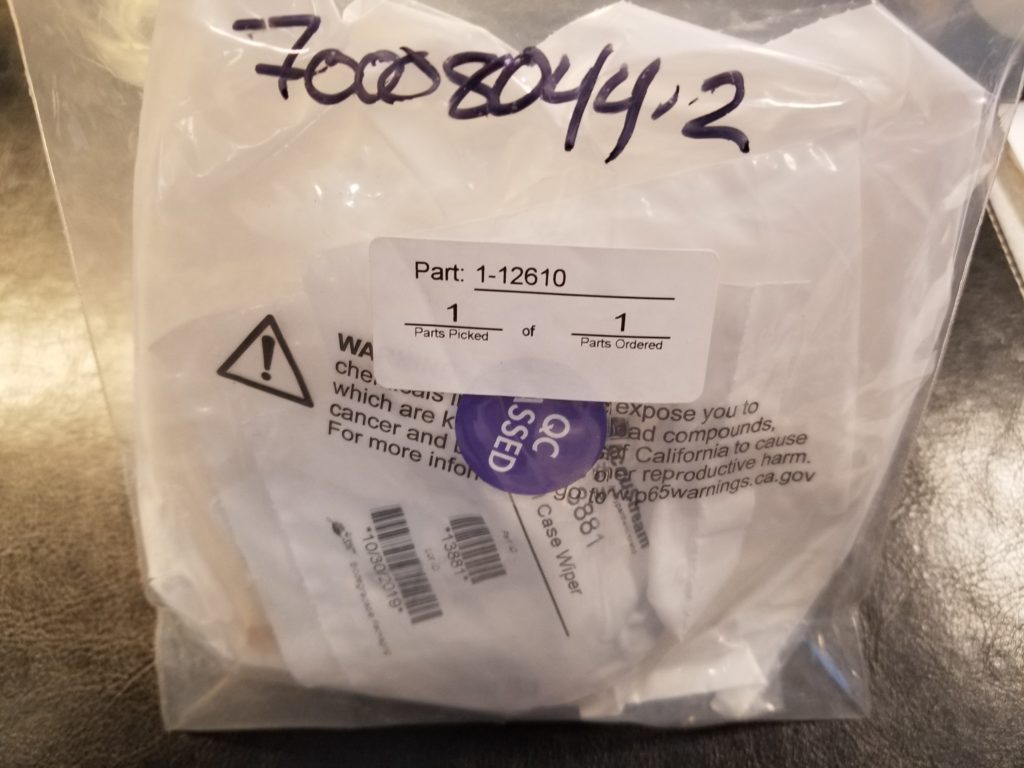
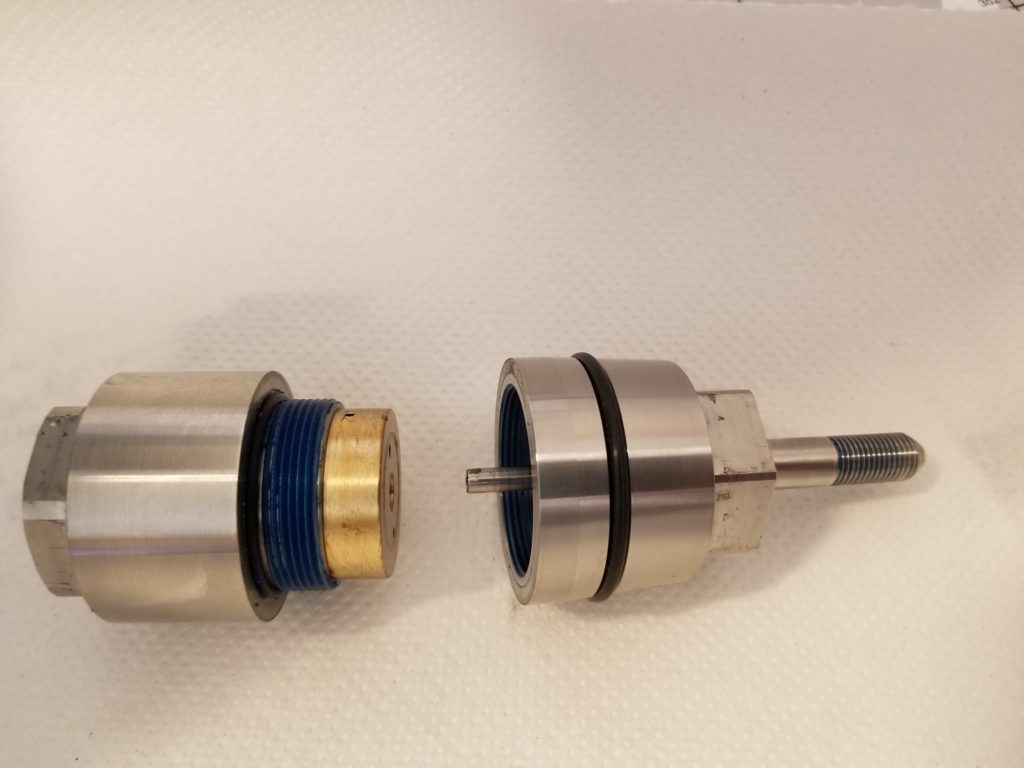
How to assemble a High Pressure Swivel 70008044-2 Kit.
You will need the following:
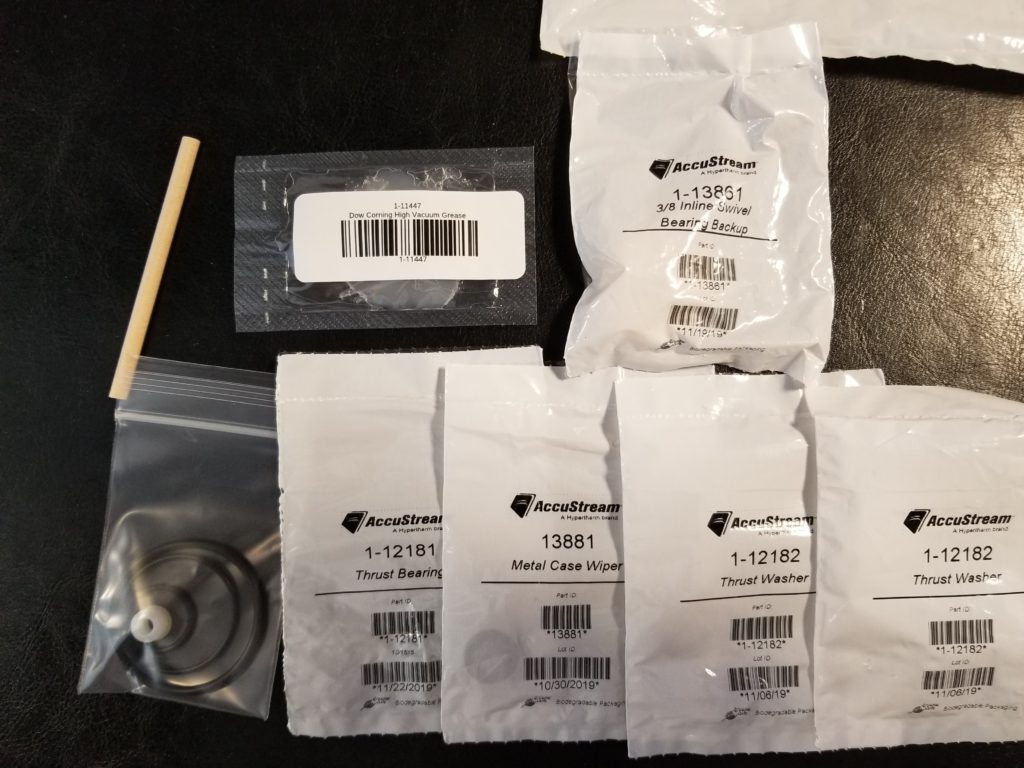
- Large adjustable wrench
- 1 & 1/8″ open or box end wrench
- Isopropyl alcohol
- Lithium grease
- Blue Goop
- O-Ring lube
- O-Ring pick or small flat blade screw driver
- Seal Removal Tool
- Bench Vise
- Hammer
- Arbor press – if available
- 0.575″ gauge pin – will need to purchase elsewhere if desired, not needed – for use with arbor press

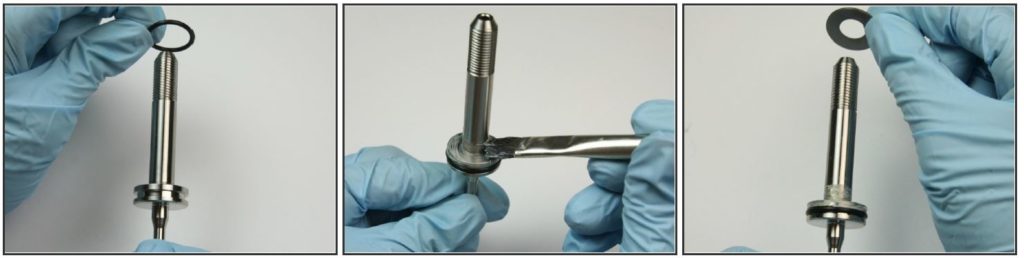
Loosen the high-pressure gland from the coupler with 1-1/8″ and 13/16″ wrench.
Unthread the high-pressure gland from the coupler.
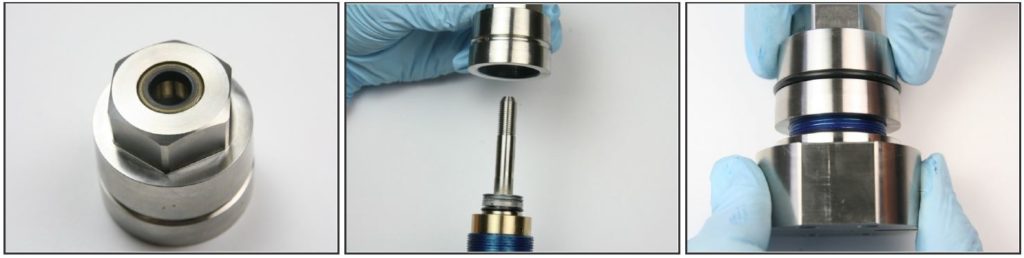
Unthread the collet from the swivel shaft.

Remove the high-pressure gland from the swivel shaft.
Clean the high-pressure gland and the collet of all Blue Goop.
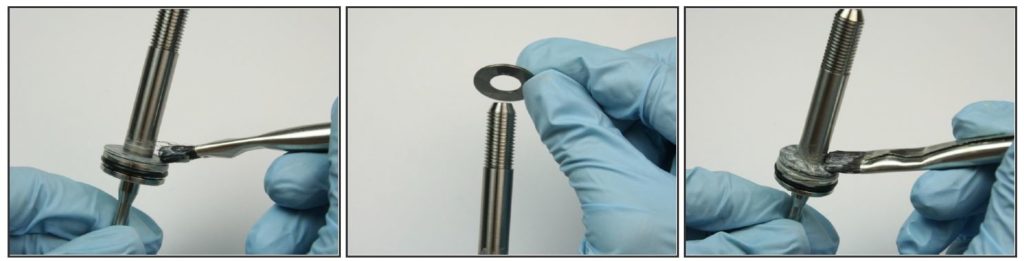
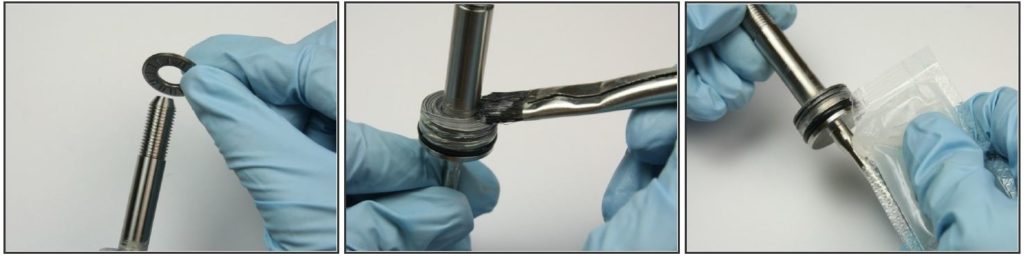
Loosen the high-pressure gland from the seal half of the swivel housing with 13/16″ wrench.
Unthread the high-pressure gland from the seal half of the swivel housing.
Clean the high-pressure gland of all Blue Goop.
Loosen the bearing half from the seal half of the swivel housing with an adjustable wrench and 1 & 1/8″ wrench.
Unthread the bearing half from the seal half of the swivel housing.
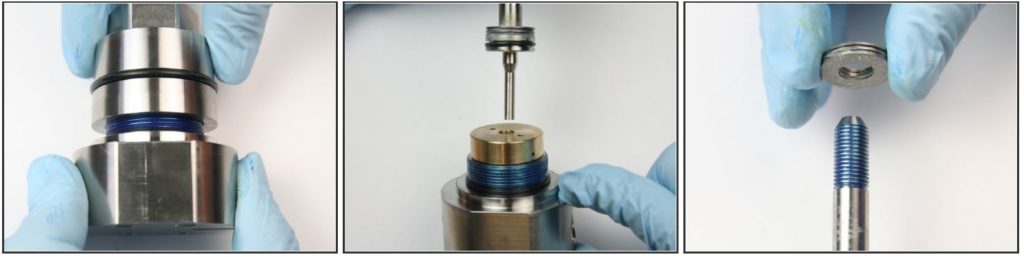
Pull the Swivel shaft out of the back-up bearing.
Remove the thrust bearing and the thrust washers from the swivel shaft.
Remove the O-ring from the groove of the swivel shaft with a pick.
Clean the swivel shaft of all lithium grease and Blue Goop with isopropyl alcohol.
Remove the O-ring from the outside groove of the bearing half of the swivel housing.
Remove the metal capped wiper from the cavity of the bearing half of the swivel housing with a pick or flat blade screw driver.
do not scratch or damage the bearing half of the swivel housing with the pick!
Clean the bearing half of the swivel with isopropyl alcohol.
Remove the bearing back-up from the seal half of the swivel housing.
Remove the O-ring from the seal half of the swivel housing.
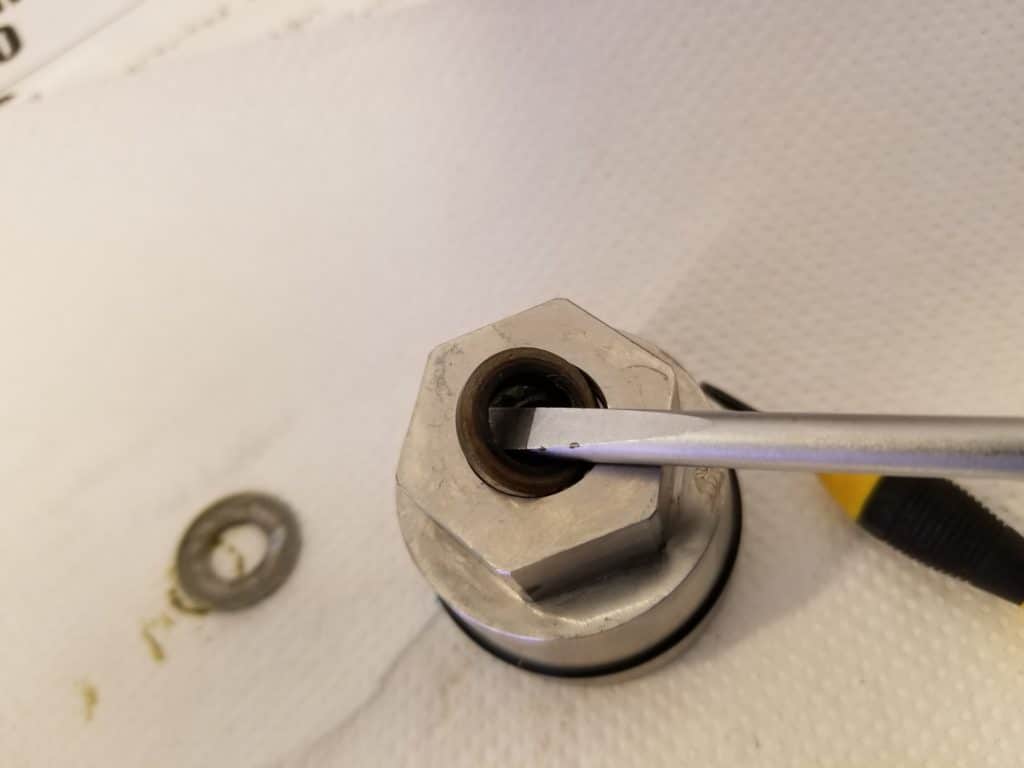
Use a pick to remove the high-presssure seal inside the seal half of the swivel housing.
do not scratch or damage the id of the seal half of the swivel housing with the pick.
Clean the seal half of the swivel housing of all Blue Goop with isopropyl alcohol.
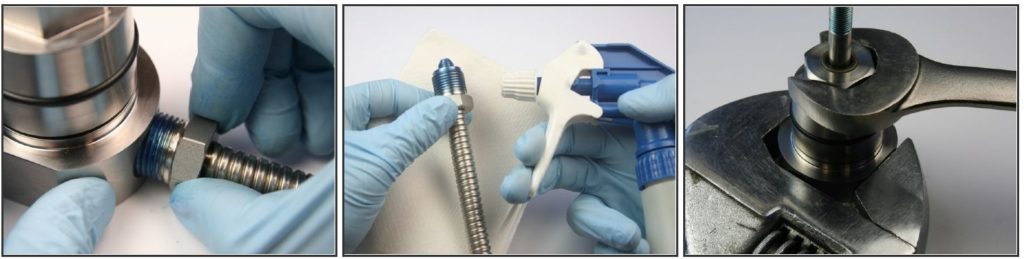
Apply a layer of high vacuum grease into the cavity of the seal half of the swivel housing.
Apply a layer of high vacuum grease to the high-pressure seal.
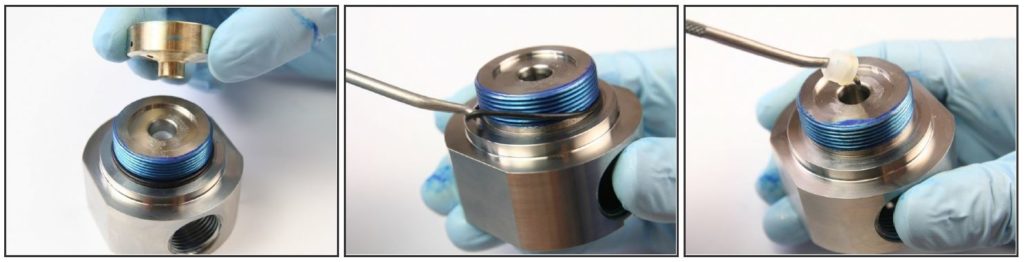
Put the high-pressure seal (O-ring side first) into the cavity of the seal half of the swivel housing.
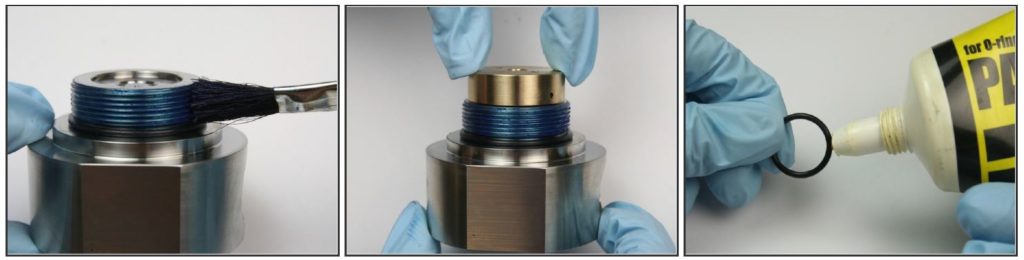
Apply a layer of O-ring lube to the medium sized O-ring.
Put the O-ring onto the threads of the seal half of the swivel housing and push to the base of the seal half.
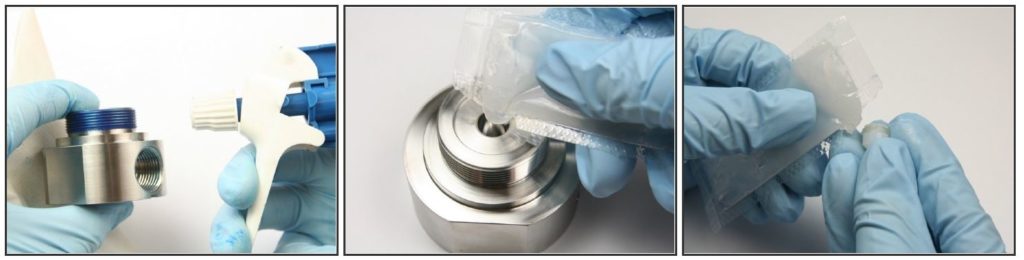
Apply Blue Goop to the external threads on the seal half of the swivel housing.
Put the new back-up bearing (cupped side down) on the top of the seal half of the swivel housing.
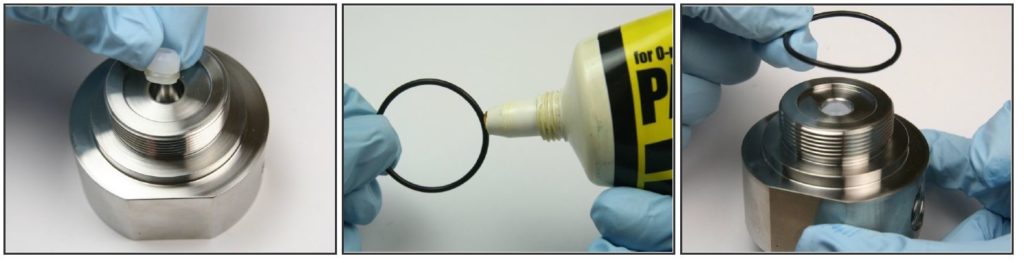
Apply O-ring lube to the smallest O-ring.
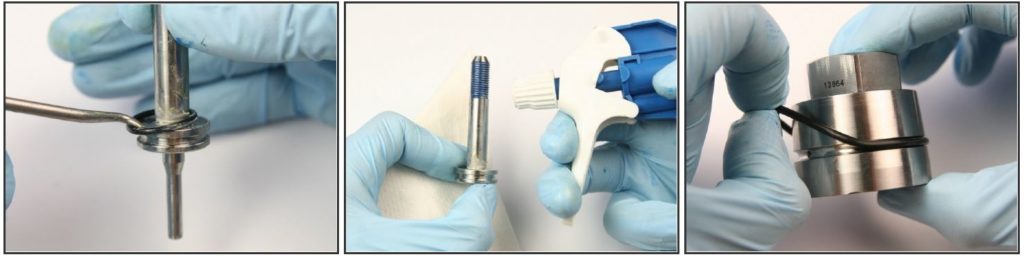
Put the smallest O-ring onto the swivel shaft groove.
Apply a layer of lithium grease to the base of the swivel shaft.
Slide the first thrust washer onto the swivel shaft.
Apply a layer of lithium grease to the top of the thrust washer.
Slide the thrust bearing onto the swivel shaft.
Apply a layer of lithium grease to the top of the thrust bearing.
Slide the second thrust washer onto the swivel shaft.
Apply a layer of lithium grease to the top of the second thrust washer.
Apply a layer of high vacuum grease on the non-threaded side of the swivel shaft.
Put the short end of the swivel shaft into the back-up bearing.
Using an arbor press or a gentle tap from a hammer and the old metal cased wiper turned upside down on top of the new metal cased wiper, press the metal cased wiper into the cavity of the bearing half of the swivel housing (rubber-side down).
Using a .575″ gage pin, press the wiper down with an arbor press until the wiper bottoms out. If not using arbor press, use the above mentioned method to tap the wiper into place.
Make sure the wiper sits just below the top of the cavity.
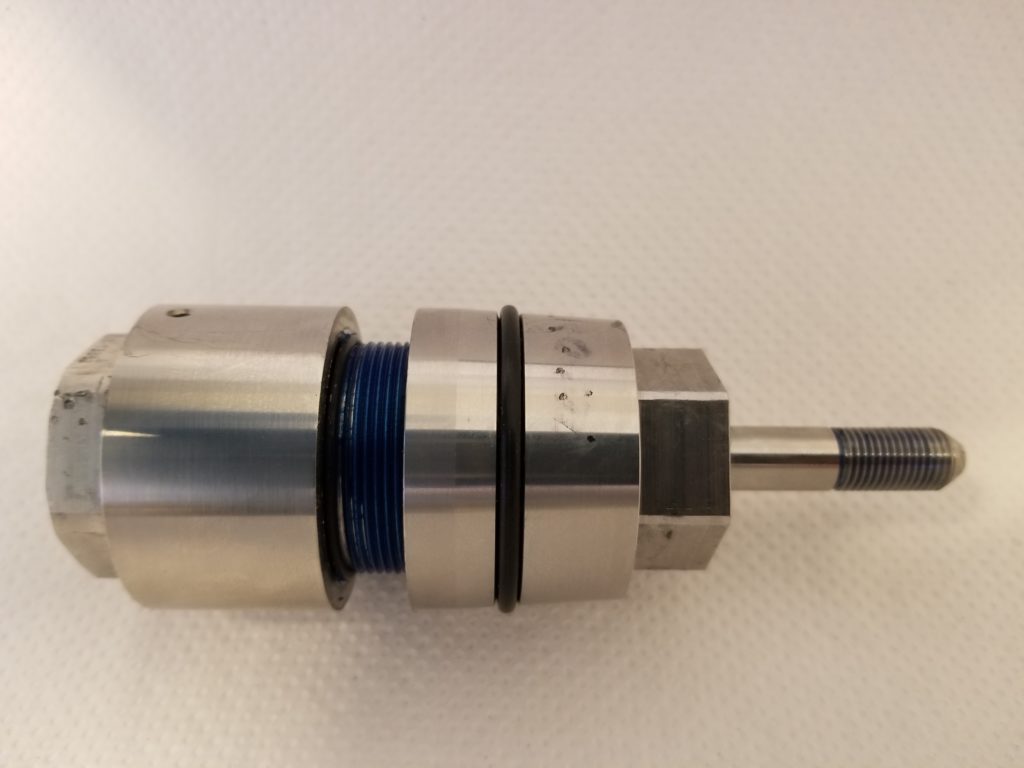
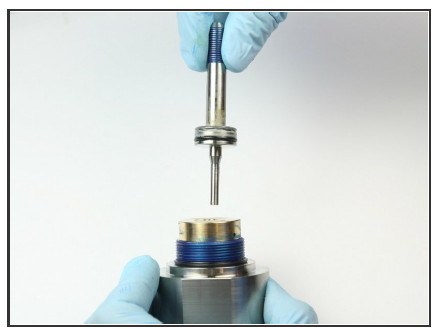
Put the seal half into the bearing half of the swivel housing.
Thread the bearing half onto the seal half of the swivel housing.
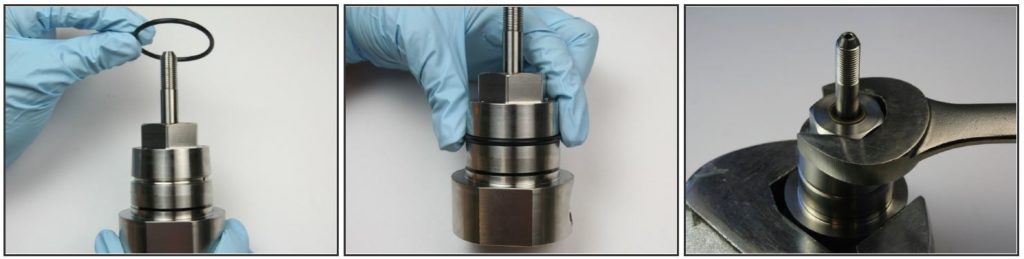
Tighten using a 1-1/8″ wrench on the bearing half of the swivel housing and a large adjustable wrench on the seal half of the swivel housing.
Roll a dust protecting O-ring over the bearing half of the assembly.
Roll the O-ring until it rests in the cavity of the swivel housing covering the two small holes.

Apply Blue Goop to the threads of the swivel shaft.
Apply Blue Goop to the high-pressure gland threads.
Put the high-pressure gland on to the swivel shaft with the threads up.
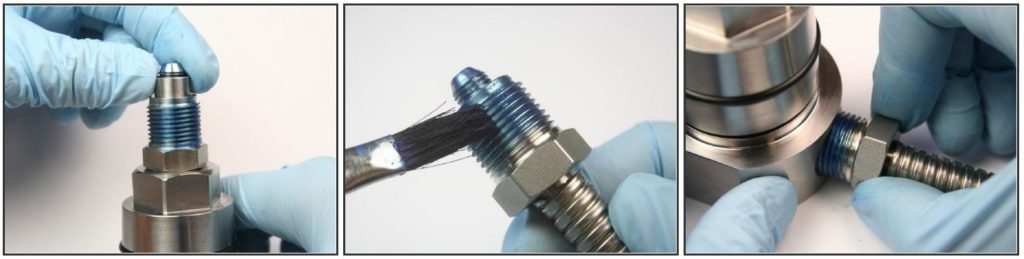
Thread the 3/8″ collet onto the swivel shaft.
Apply Blue Goop to the threads of the high-pressure gland.
Thread in the high-pressure gland into the swivel housing.
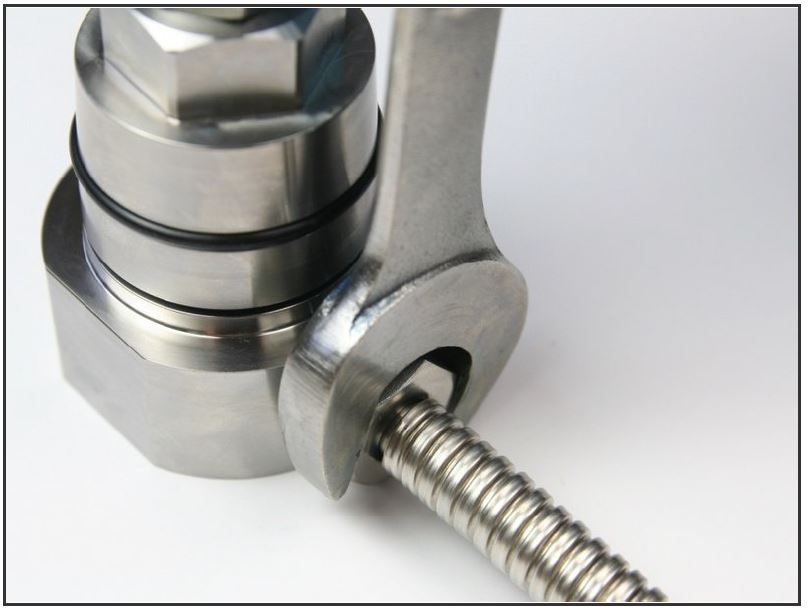
Tighten the high-pressure gland into the swivel housing with a 13/16″ wrench.