
Park has discovered that a relay found in your PROEDGEIV automated edge shaping and polishing machine should be replaced. It is possible that one of the relays in the PLC (computer) has the potential of being damaged from quick, short draws of electrical current passing through it. Although this has happened in only a very few isolated cases, we have decided to send out replacement parts to you free of charge to you as a preventive measure.
This new external relay is designed to handle a larger load of current and it can’t get overworked as the internal one in the PLC may do now. The relay you are installing only controls the “miter up” function. No computer memory or mechanical adjustments will need to be done after the installation of this part. The replacement of this relay can be easily done by you using simple tools. Please follow the instructions in the rest of this document very closely. We suggest doing this replacement as soon as your schedule permits. Replacement of the part may actually save you from an unplanned downtime replacement later on. The instructions show how to install the new relay in your machine. There is a list of tools needed to do the job and all the wires in the machine are clearly labeled to make the install go faster. If you have any questions, please call Park’s service department at any time and we will answer your questions.
Scan to Read on Device:

Read through these instructions before starting. Gather the tools before you start and it should take you less than an hour to have the new parts installed and your machine up and running again.
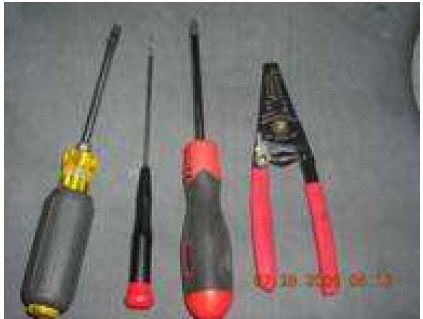
- Required Tools for Procedure:
- 1 Medium size Philllips Screwdriver
- 1 small flat head screwdriver
- 1 wire stripper
- 1 Large Flat Head Screwdiver
Finding the wires to remove.
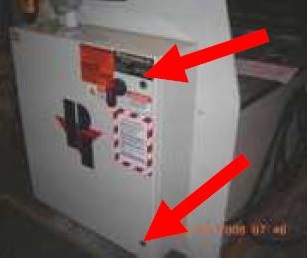
Use your Company’s Lock out, Tag out procedure before entering the Main Electrical Panel.
A large Flat Blade screw driver is needed to open the Electrical Panel
Remove the white plastic covers of the electrical wire ways. You will be adding the new wires in the wire ways and removing one wire.
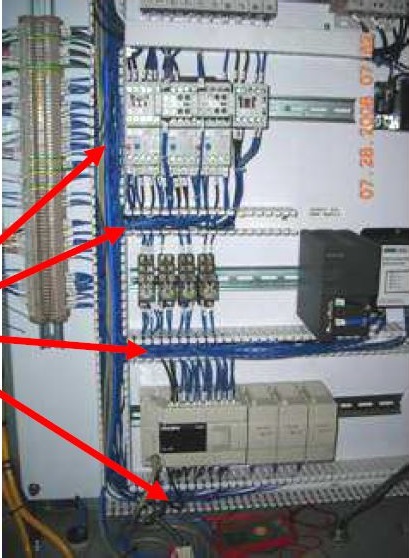
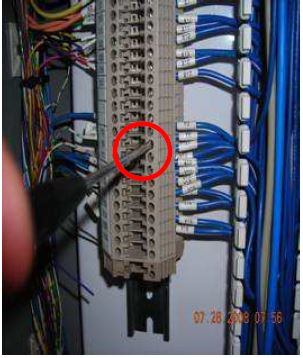
Removal of wire Y6.
Remove wire labeled Y6 from the PLC (left photo, use a Phillips screwdriver) and from the terminal strip on the right side. (picture at right), use a small flat head screw driver). This wire can be removed completely and discarded.
Picture at right: Use a small flat head screw driver). This wire Y6 can be removed completely and discarded.
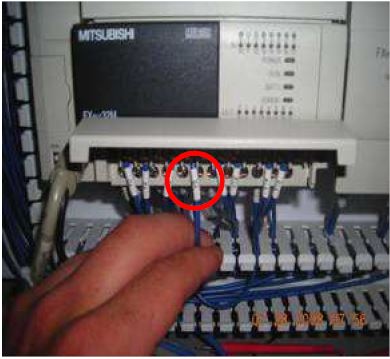
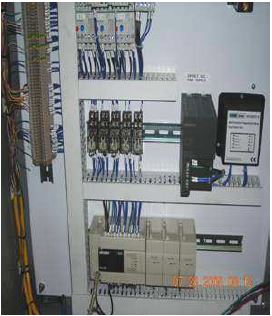
Install the new replacement RELAY and wires.
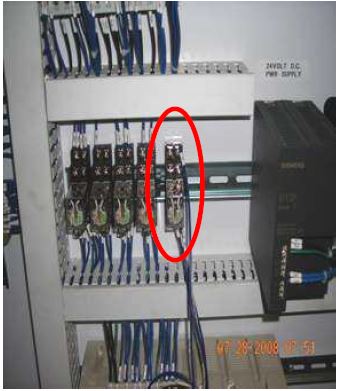
Next take the new relay sent to you and install it on the right side of the four relays that are located in the electrical cabinet. There should be one wire on the top, and three on the bottom. (shown below).
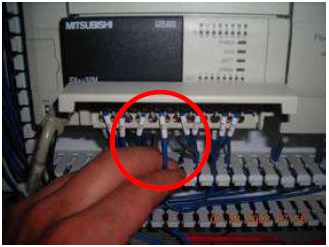
Connecting new wires.
Wire Y6, the one that comes out of the top of the new relay goes to the terminal strip. It gets connected where the old one was removed. The wire labeled Y6 that comes out the bottom of the relay goes to the PLC. It gets connected where the old wire was removed from. (shown below) Make sure all the wires are tight.
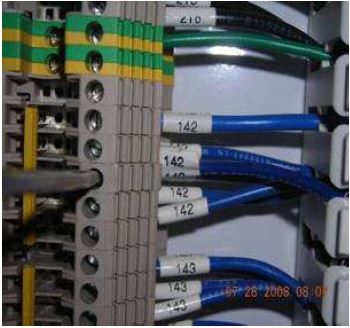
Terminate the new wires at Terminal strip.
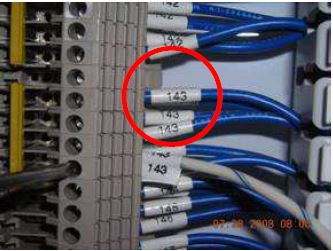
Find a terminal labeled 143 on the terminal strip. There will be more than one, they will all work the same. Find the end of the wire labeled 143, it comes out the bottom of the relay. Take the end that isn’t
connected and wire it into the terminal labeled 143. (shown in the picture below) It is OK to have more than one wire in the same terminal. Make sure all the wires are tight.
Make sure the 142 wires and 143 wires go into the correct Terminal strip slots as they are next to each other.
Find a terminal labeled 142 on the terminal strip. Again, there will be more than one, any of them will
work. Find the end of the 142 wire that isn’t connected and wire it into terminal labeled 142. Once again, it’s ok to have more than one wire in the same terminal. Make sure all the wires are tight.
Double check wiring locations and terminal screw tightness.
You should now have all the wires connected and the procedure is finished. Place the plastic covers back over the wire ways. The power to the machine may now be turned back on. To test whether your wiring was done correctly, turn on the hydraulic pump and run the miter up and down a few times.
If you have any problems installing the relay, please call Park Industries at 800-785-3391.