This document illustrates the steps required to adjust the Miter Home Position Coordinate on a Velocity machine. The miter on the Velocity homes off of a proximity sensor mounted by the compensation arm on the exit end of the machine. If this proximity sensor is adjusted, moved, or replaced the following steps need to be completed.
Scan to Read on Device:

Skill Level

Estimated time to complete: 15-20 minutes
- Remove one of the polishing pads from any spindle on the bridge.
- Go to the Main or Home Velocity screen.
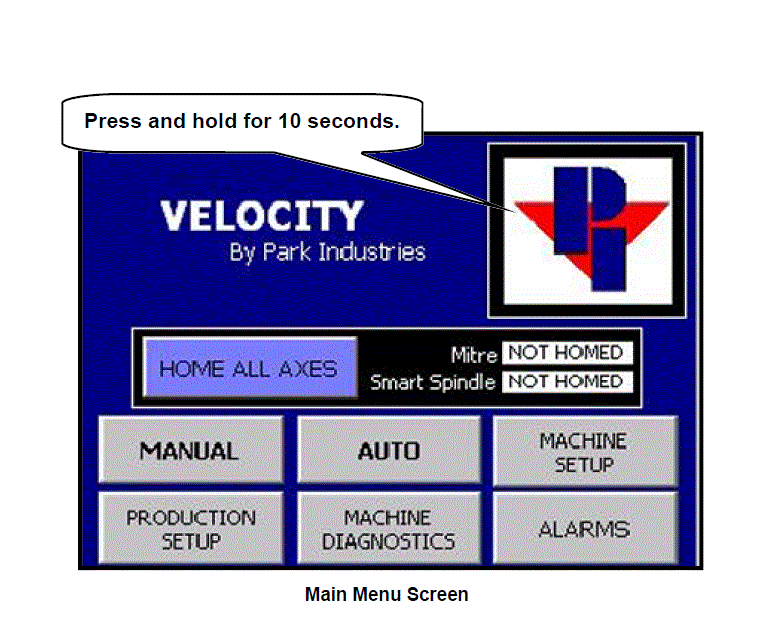
- Access the Service screen by pressing and holding the PI logo in the top right corner for 10 seconds.
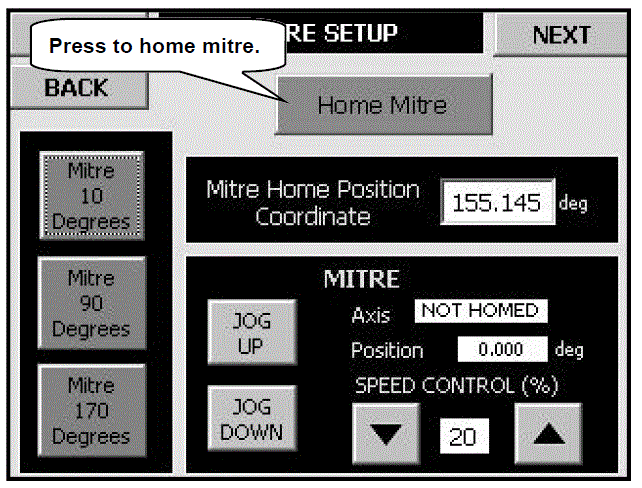
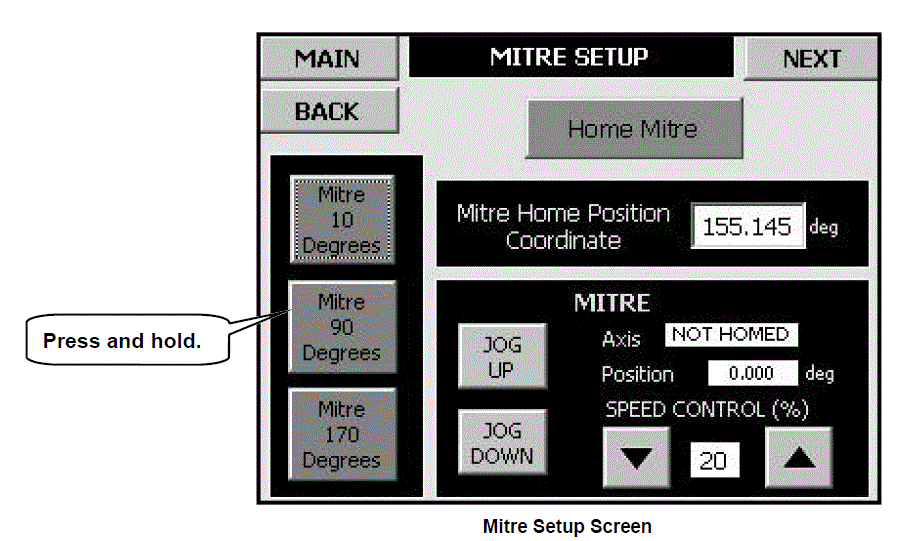
- Go to the third setup screen or Mitre Setup.
- Press and hold the “Miter 90 Degrees” button on the left side of the screen to rotate the miter to the horizontal position.
- Lay the aluminum bar (60″ x 8″ supplied with machine on the conveyor belt in front of the spindle you removed the polishing pad from.
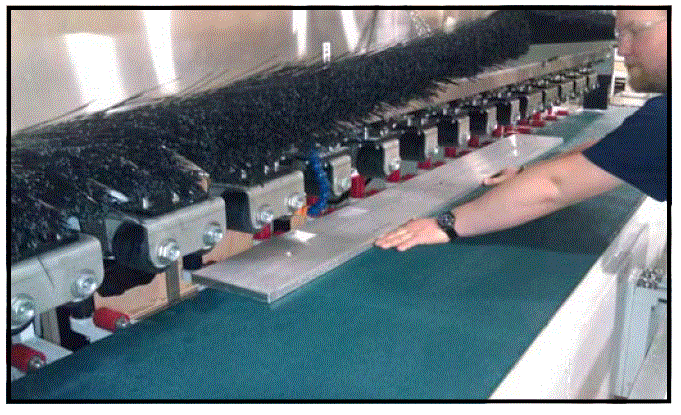
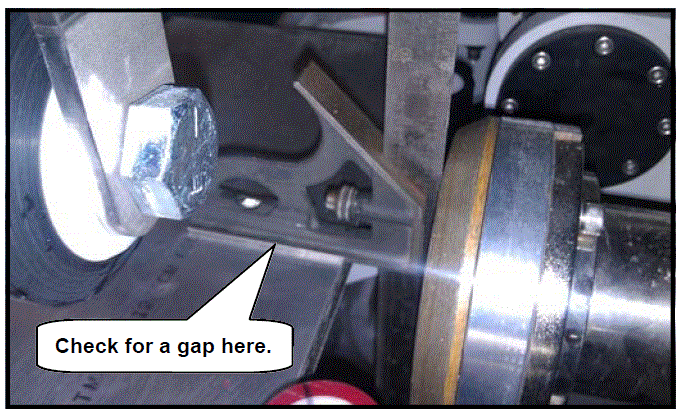
- Using a carpenter square, press the straight edge flush against the spindle with the pad removed. Check the base of the square for a gap where it seats against the aluminum bar. If there is a gap you will need to adjust the Miter Home Position Coordinate located in the center of the screen.
- If the bridge is too low and needs to be moved up, then number needs to be smaller. If the bridge is too high and needs to be moved down, the number needs to be larger. Adjust the value at this time.
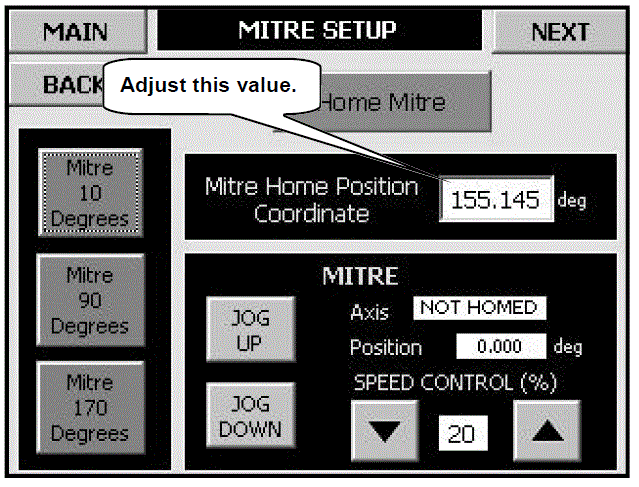
- Once the new value is entered, press the red button above it that says “Home Miter”. The button will begin to flash and the bridge will move up and home out. When the homing cycle is complete the button will turn solid green and display “Miter Homed”.
- Press and hold the “Miter 90 Degrees” button on the left side of the screen again. Using the carpenter square, check the bridge as you did in step 7 and Repeat steps 7-9 until the bridge is square.
- Once the bridge is square, exit out of the service screen, set tool wear and return the machine to operation.