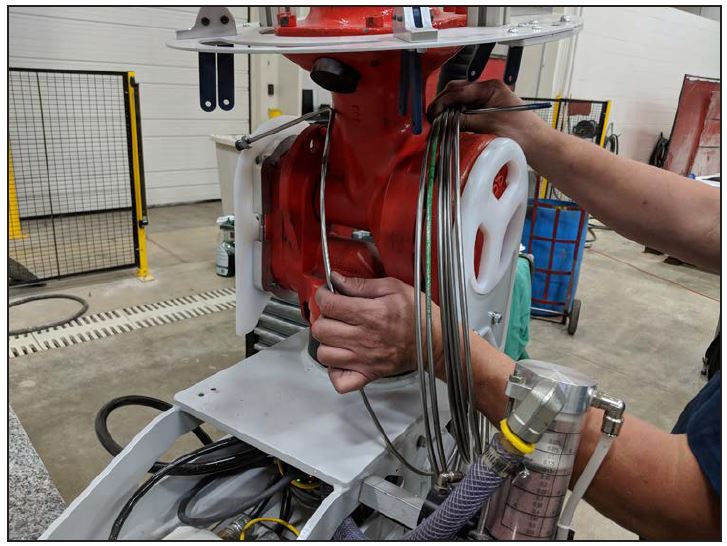
The following procedure illustrates disassembly of Optimus Axis #6 Coil.
Disassembly
Procedure
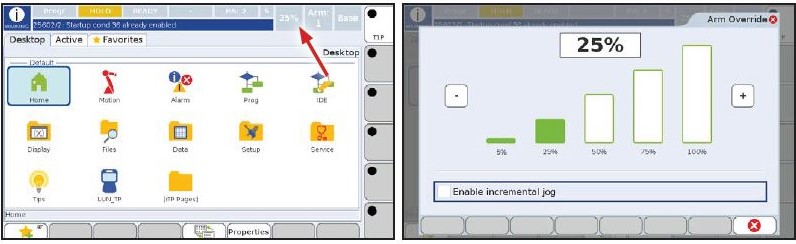
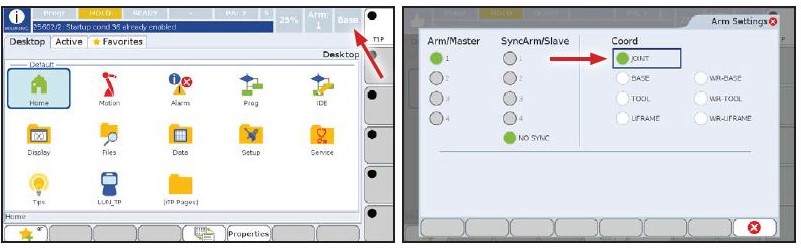
Set Arm Override Speed
Set Motion Control to Joint
Position for Disassembly
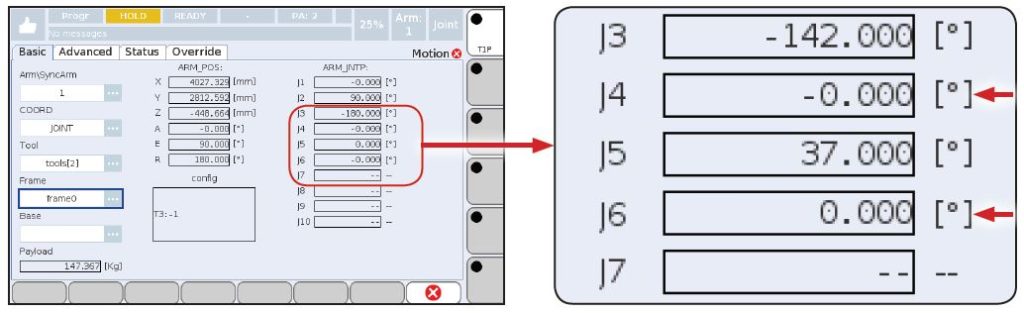
for disassembly. Position axes J4 and J6 such that their positions are equal to zero as shown:
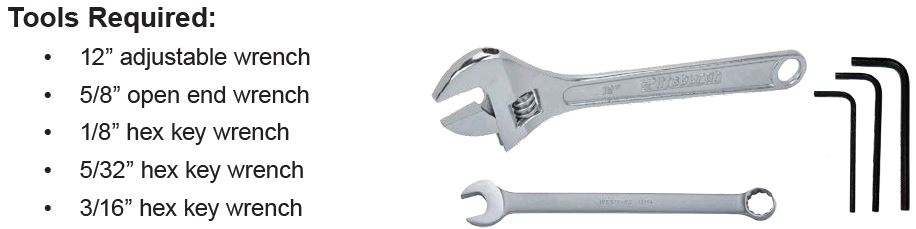
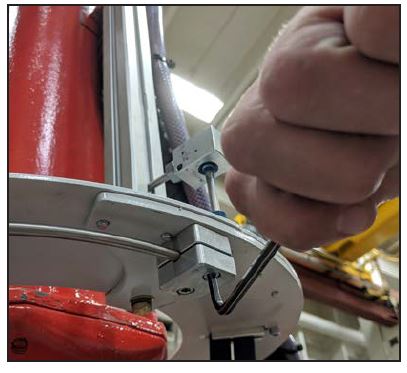
Remove Socket Head Set Screws

Using a 1/8” hex key wrench, remove eight SHCS from the coil hanger bodies.
Remove Button Head Cap Screws
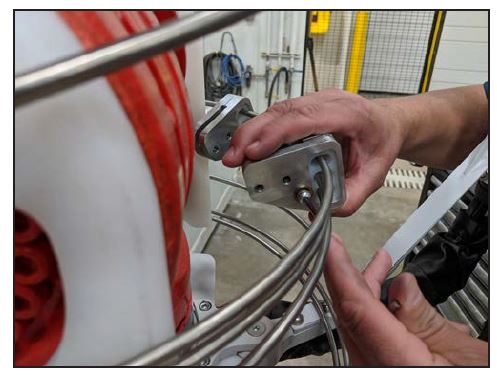
Using a 5/32” hex key wrench, remove four BHCS from the coil hanger bodies.
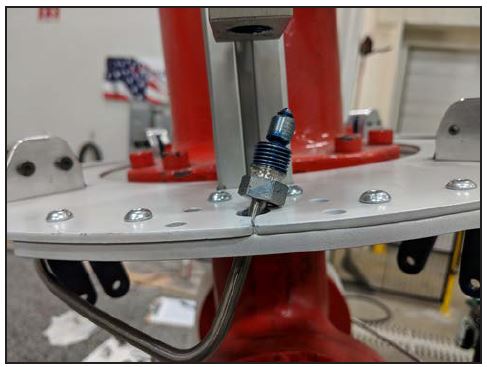
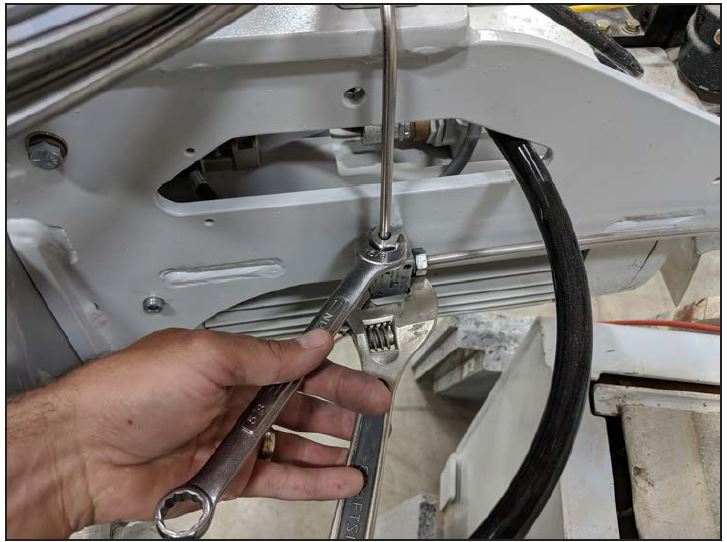
Disconnect High Pressure
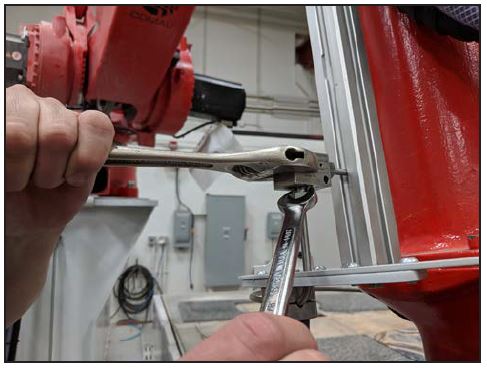
Using a 5/8” open end wrench and adjustable wrench, disconnect the top-side high pressure gland nut from the bottom of the 90 degree fitting.
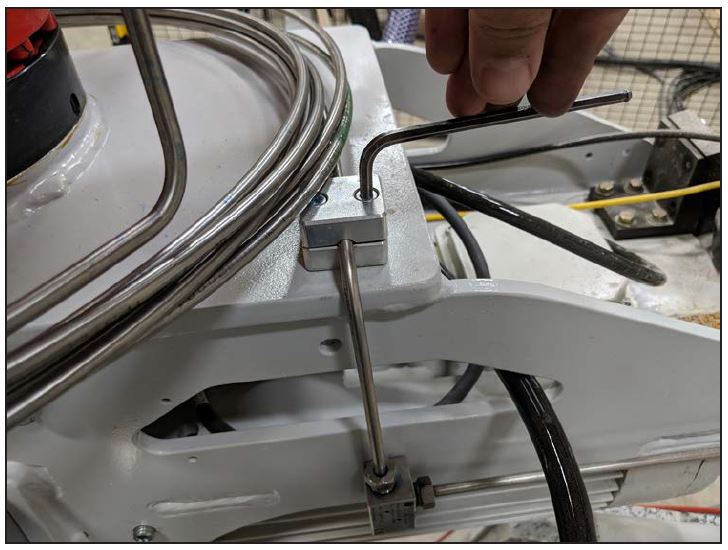
Remove Tube clamp SHCS
Use a 3/16” hex key wrench, remove two SHCS from the high pressure tubing clamp.
Remove Top-Side Collar
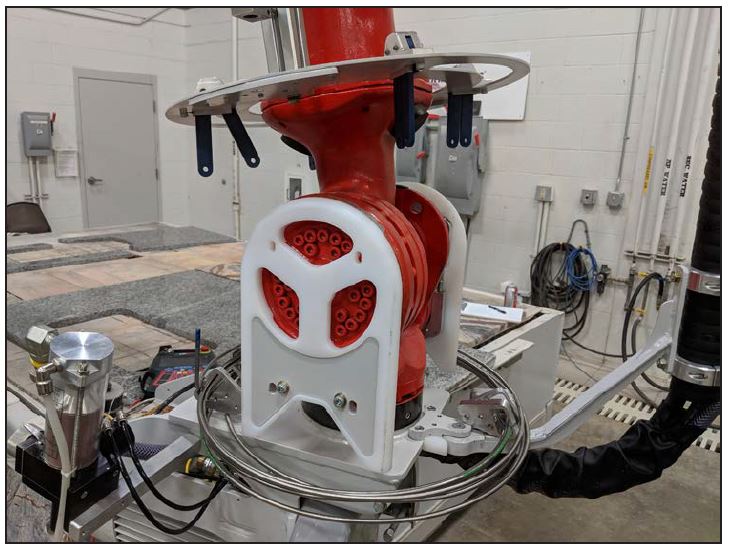
Remove the coil’s top-side collar and gland nut allowing the coil to collapse onto the end effector motor mount top.
Unwind Coil Hangars
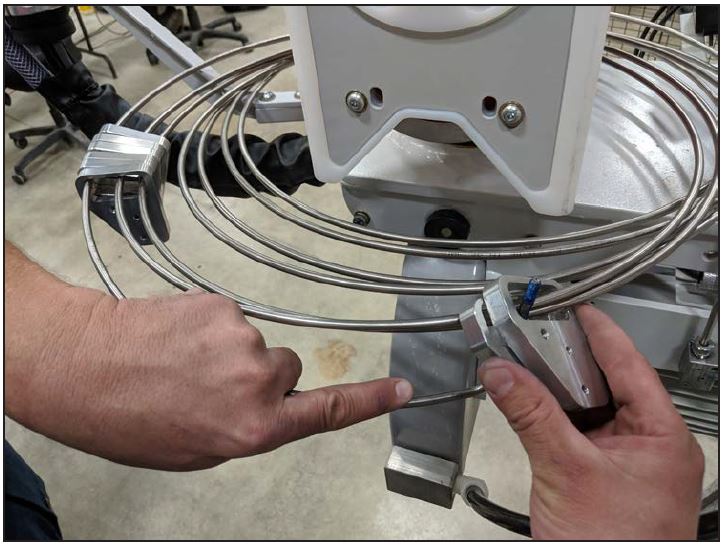
Unwind the coil hangers in a clockwise motion sliding the coil’s top-side end through the coil hangers on each pass.
Loosen 90 degree HP fitting
Using a 5/8” open end wrench and adjustable wrench, disconnect the bottom-side high pressure gland nut from the top of the 90 degree fitting.
Remove Screws / tubing clamp
Use a 3/16” hex key wrench, remove two SHCS from the high pressure tubing clamp.
Removing HP coil
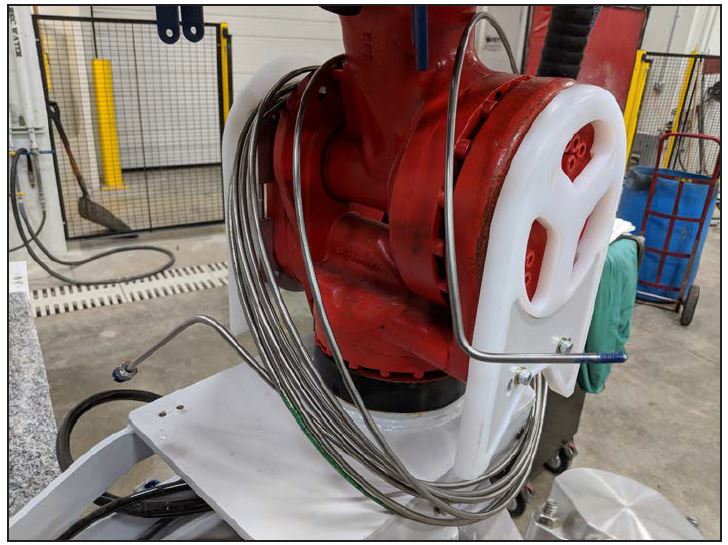
Remove coil by unwinding it around the neck of axis four just above the robot wrist.
**Note: use masking tape or alike to protect painted surfaces while sliding the coil tubing against the robot. Remove coil by unwinding it around the neck of axis four just above the robot wrist.