
This guide will demonstrate how to replace your ball screw on Titan and Fusion machines. The ball screw is what the Z axis travels on to move up and down.
Scan to Read on Device:

Remove the hood from the machine and disconnect the water skirt. you will need to label and then disconnect the air lines.
If possible, raise the spindle up as high as it can go so you can work on the lower bearing.
Now you can remove the silver guard from around the bottom of the screw.

Look at the picture, clean off all the rust and grit from the shaft that sticks out below the orange bearing. Spray the shaft with some penetrating oil.
Use a screwdriver to lift the orange seal cover from the bearing. Now you should be able to see the set screws on the bearing, remove them.
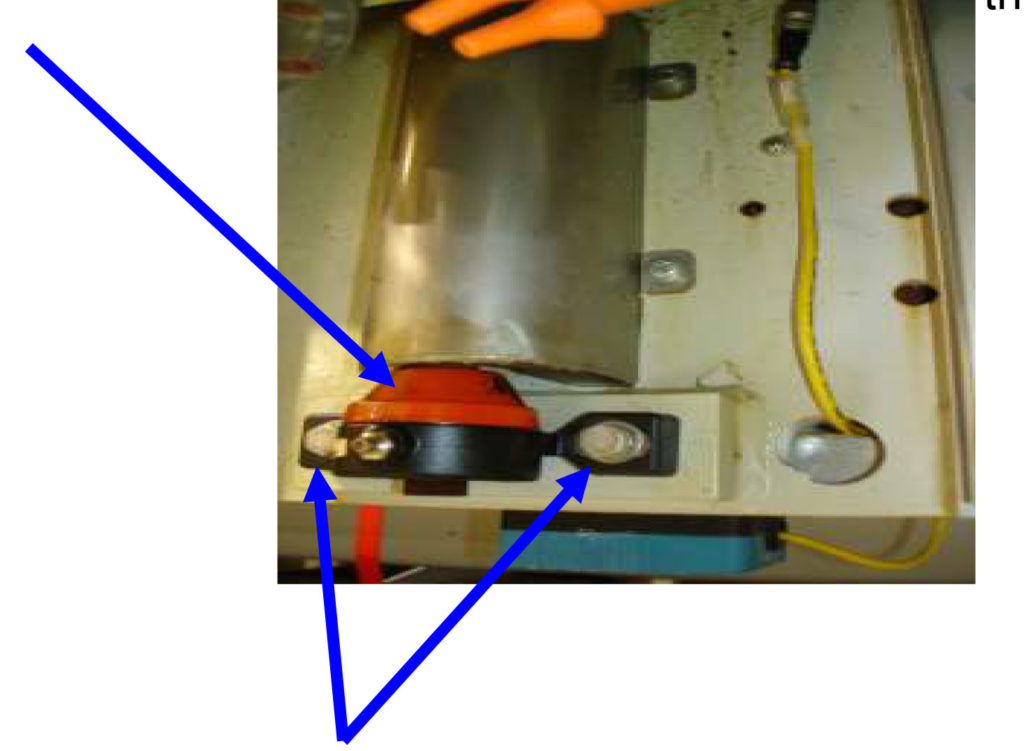
Remove the 2 bolts that hold the bearing mount.
Remove the bearing from the shaft. You may need a small puller.
Once you have the bearing removed you can carefully lower the spindle.
FOR YOUR SAFETY:
You Must do the following to keep the rise and fall from sliding off of the rails during the next steps
Place a bottle jack on a wood block on the table and under here to support the rise and fall assembly while doing the following steps. The jack should be just touching the bottom of the rise and fall plate.
Do Not try to jack it up as you can cause further damage.
next we are going to work at the top of the machine.
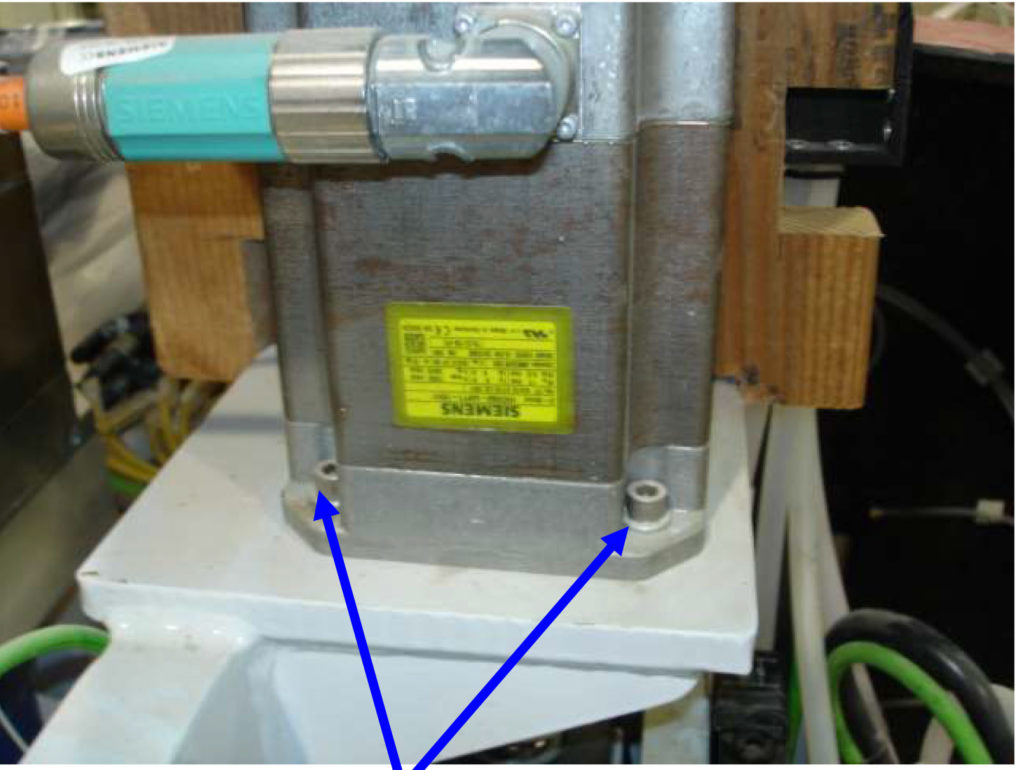
Remove the 4 Allen head bolts from the rise and fall motor and then lift the motor up and out of the mount. You should not need to disconnect the wires. Set it in a safe location on the machine, do not hang it by the wires.
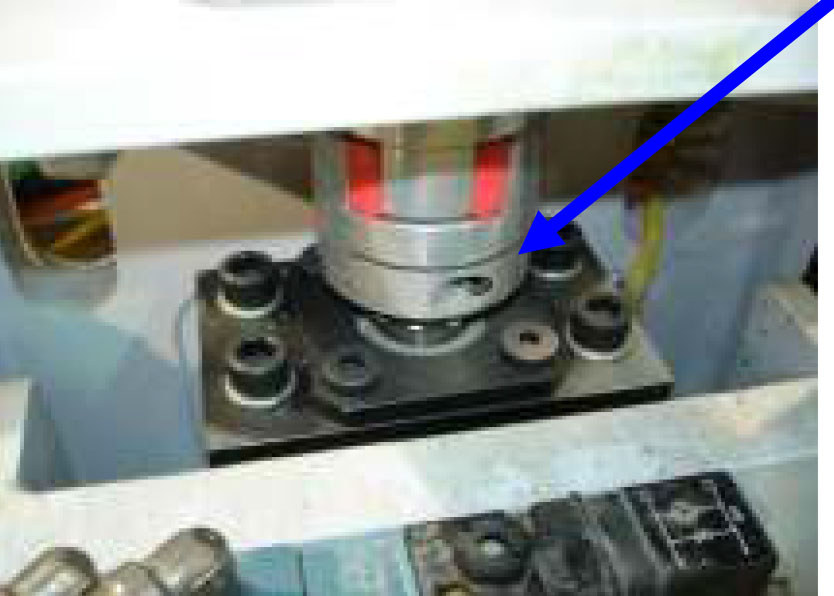
Remove the silver coupler from the top of the ball screw. You will reuse this part.
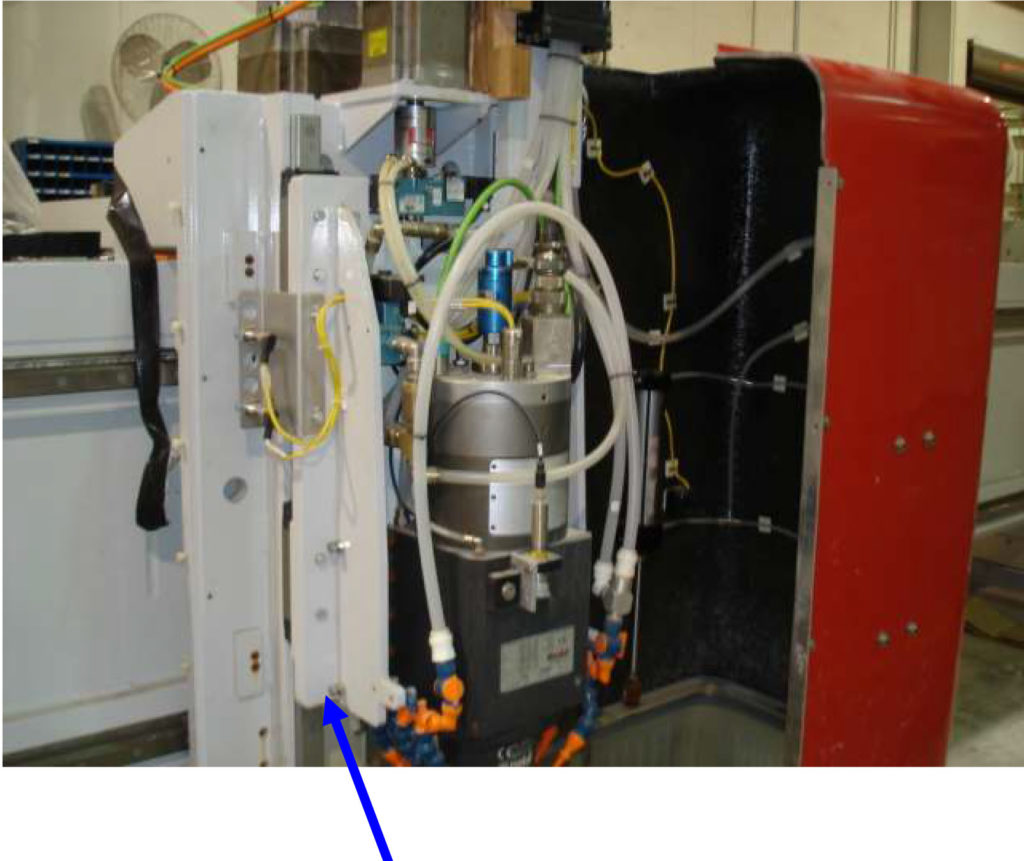
Note the direction and location of where the grease fitting is on the ball screw, we will line up the new one the same. Carefully remove the black grease line from the ball screw down in behind the spindle, it is located on the piece that looks like this picture
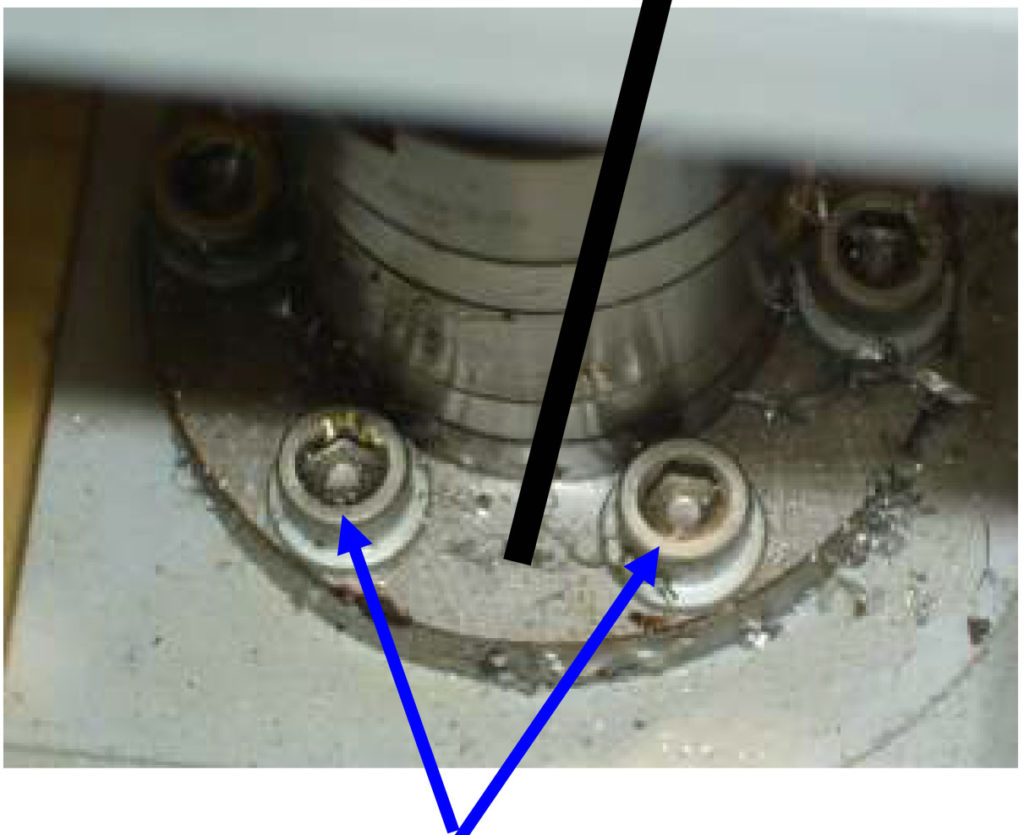
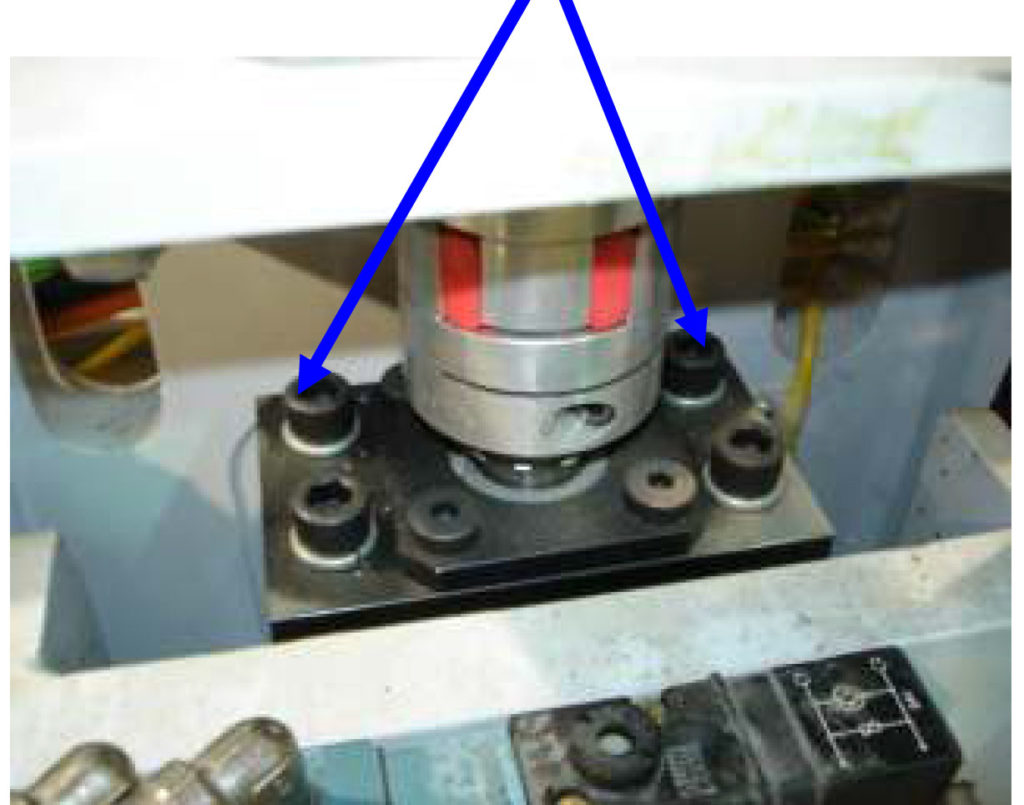
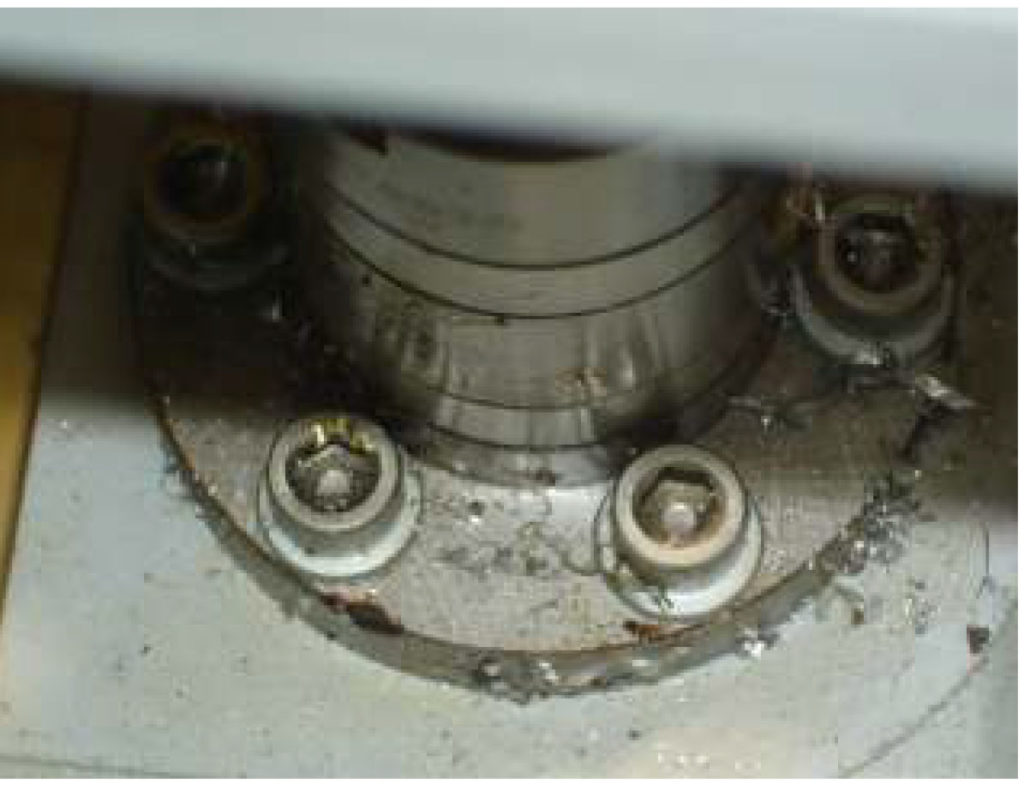
Remove all 6 Allen head bolts around the ball nut.
Remove the 4 Allen head bolts on the black top mounting block.
You should now be able to remove the old ball screw.
Clean all grease and metal or rust from the mounting areas.
Wipe a small amount of grease on the new ball screw and install the grease fitting from the old one.
Carefully get the new ball screw in position then line up the grease fitting the same way the old one was and start all 6 bolts, screw them in until they are almost touching.
do not tighten them yet
Start all 4 of the bolts in the black top mount. Turn the ball screw until the black top mount rests on the mounting plate
do not tighten them yet.

Install the coupler on the top off the ball screw shaft.

Re-install the motor making sure the coupler is engaged properly and has the orange rubber piece installed. There should be a slight gap between the top coupler piece and the bottom one. Tighten the 4 motor mounting bolts.
After the motor mounts are tight and you have the coupler adjusted you can tighten the coupler.
Now you can tighten the 4 bolts on the top black mounting block.

Turn the power back on to the machine and start the Park Industries program.
Carefully lower the bottle jack and remove it.
Turn the system on.
Using the Pendant carefully raise the spindle high enough to allow you to install the lower bearing and guard.

Tighten the bearing bolts and set screws at this time and snap the orange seal down on top of the bearing.
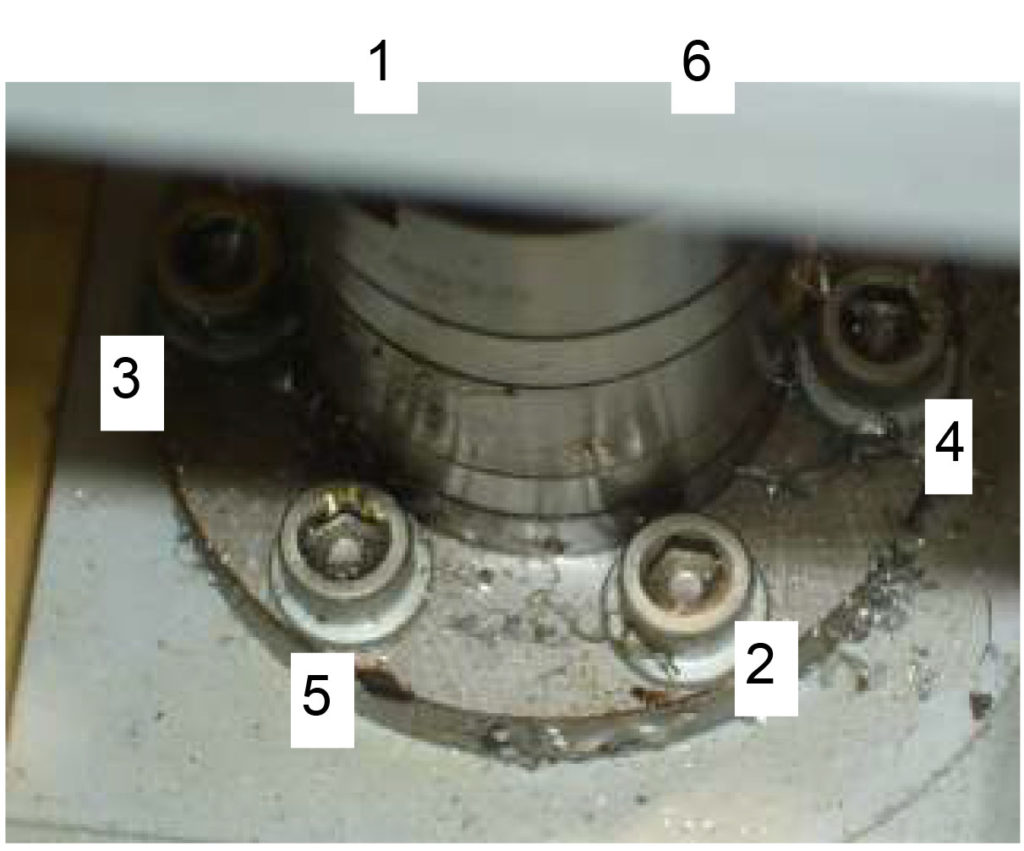
Now carefully lower the spindle until you can get at the 6 bolts and tighten them in a crisscross pattern like shown below.
Reconnect the grease line.
Now depending on what machine you have, we have to re-reference the rise and fall or re-home the machine.
Next check and adjust if needed, the tool rack height.
Run a test piece and check that the profile looks correct, if any adjustment is needed do this by adjusting the spindle to table height only. Do Not adjust each tool.
Re-install the orange hood and if your machine has it reconnect the water curtain air lines.