
Upgrading the vacuum switch for better performance and reliability
Scan to Read on Device:

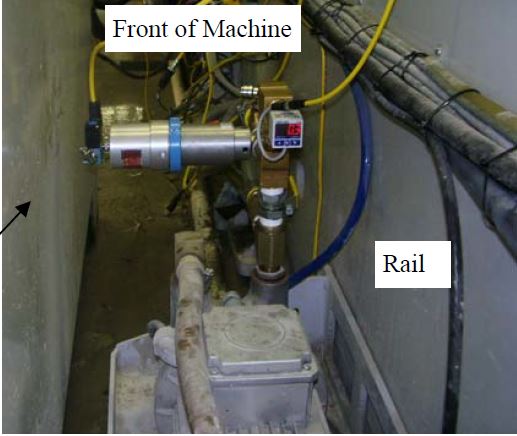
Move the machine to the front of the table, turn off power, water, and air. Lock out power to the machine.
Open the rear bellow rail cover next to the electrical panel. This will give you more room to work.
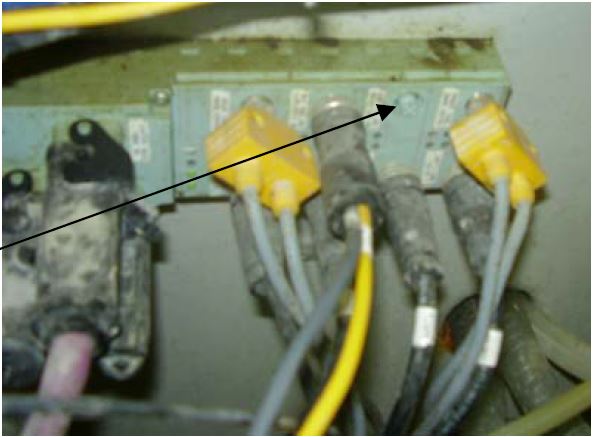
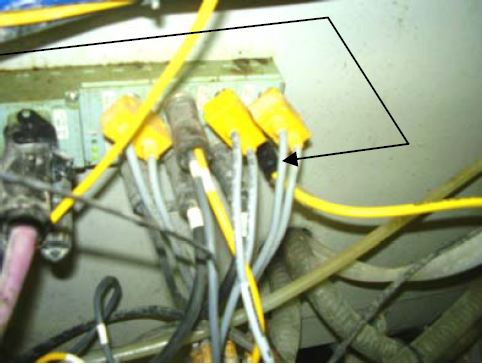
On the 8 port block on the rail next to the electrical cabinet: remove the Main Vac/Air Pressure connector from the block. Note: Your machine may have the block mounted opposite of this picture making this the second port from the bottom left corner of the block.
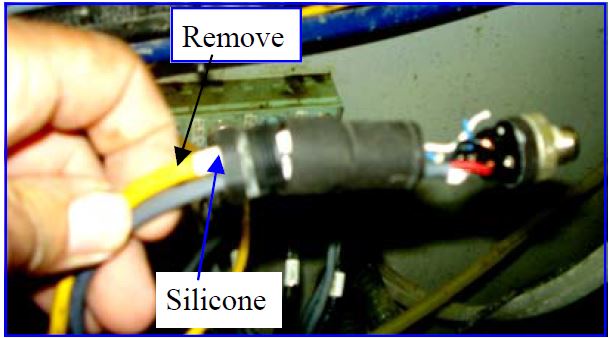
Dissassemble the plug and remove the yellow vacuum switch wire. Be sure all the other wires stay in their connectors
Reassemble the plug, put silicone in the connector to seal the hole the yellow wire was in.
Connect the plug to the #1 lead on the splitter.
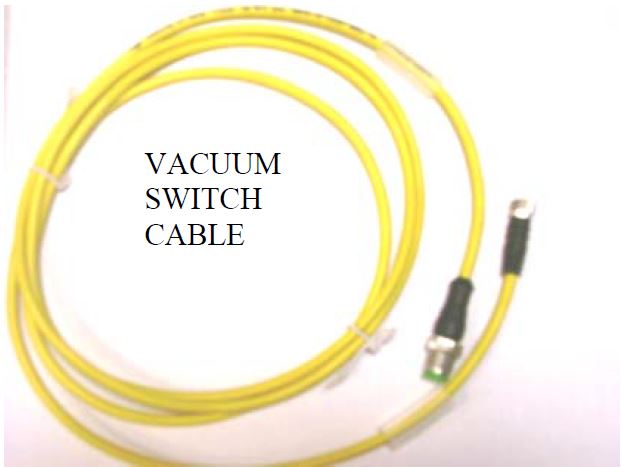
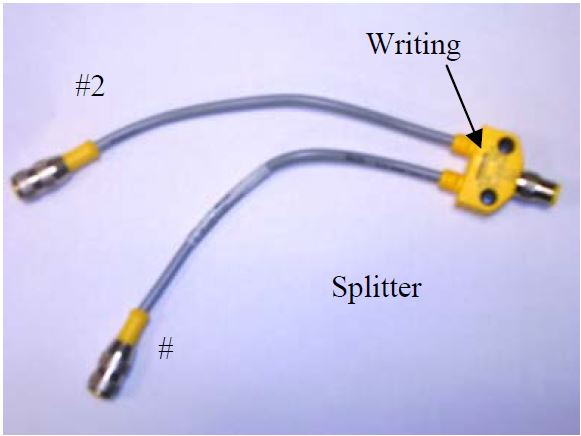
Connect the new vacuum switch cable to the #2 lead on the splitter.
Unplug the Material Vac Valve cable from the bottom right port on the 8 port block. Note: Your block may be mounted opposite of this picture making this the top left port.
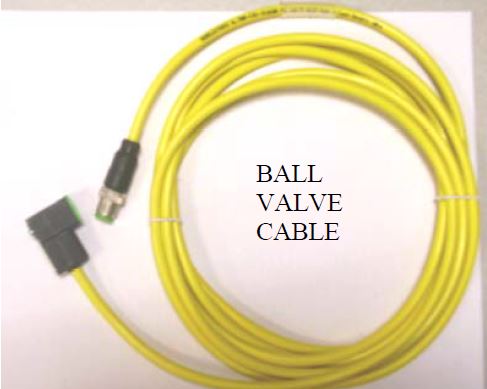
Plug the new ball valve cable into the port you removed the cable from in step #8.
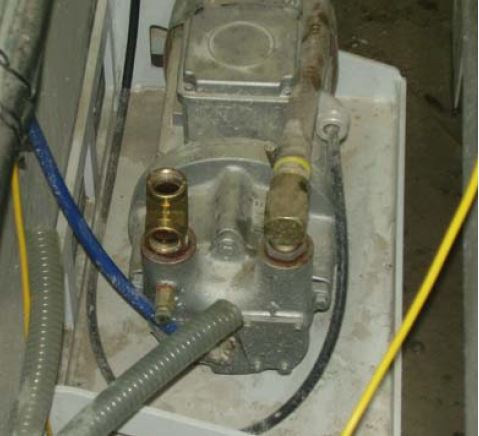
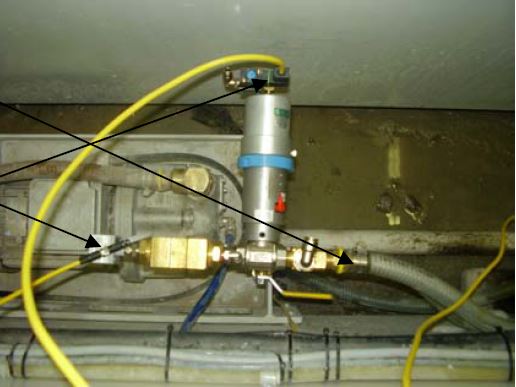
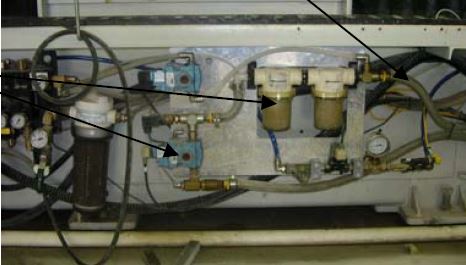
Remove both vacuum lines from the pump, it is usually easiest to cut the hose as close as possible to the barbed fitting. Remove the top vacuum line from the white vacuum filter housing.
Remove the top tee fitting from the pump.
Remove the hose barb from the bottom tee.
Connect the new 3/4” pipe nipple to the tee. Use Teflon tape on all pipe fittings.
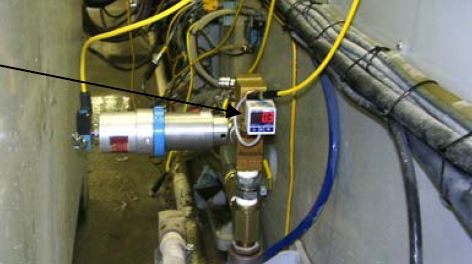
Connect the 3/4” ball valve to the 3/4” pipe nipple. Make sure the ball valve is oriented according to the picture.
Connect the 3/4” hose barb to the 3/4” ball valve.
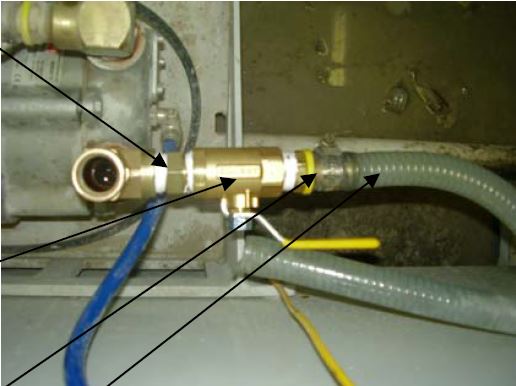
Connect the 3/4” hose barb to the 3/4” ball valve.
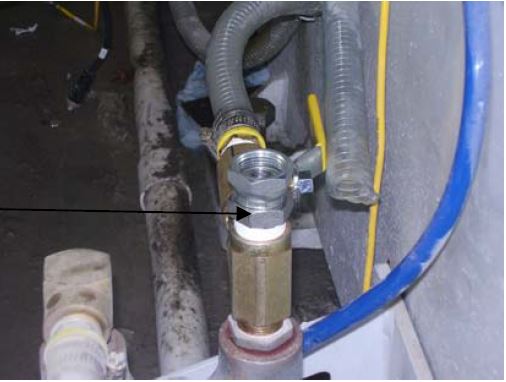
Connect the 3/4” swivel fitting to the top of the tee on the vacuum pump.
Attach the ball valve assembly to the swivel pipe fitting.
Attach the top vacuum line to the top hose barb. This is the vacuum line previously removed from the filters.
Connect the air lines as shown on the schematic.
Connect the electrical cables to the switch and valve.
Remove the vacuum filters and mac valve from the rail. Zip tie cables and air lines to the rail.
Turn on power, water, and air.
Follow the digital vacuum switch programming procedure.
Turn on vacuum, check for top and bottom vacuum on a cup. Turn float on, check for vacuum on bottom and pressure on top of a cup. Turn float off and open vacuum lines until the vacuum gauge reads less than 19 in/ hg. Check to see that the low vacuum warning shows up on the screen.
EDCO Digital Vacuum Switch Programming

*Note: To unlock the switch to program, press and hold the SET button for 5 seconds until UNL or LOC appears, then press up or down to toggle between UNL and LOC.
Press and hold SET for 3 seconds - Press UP or DOWN to select inH
Press SET- 1 no appears (Do not change)
Press SET- 2 no appears (Do not change)
Press SET- 2.5 appears (Do not change)
Press SET- nAn appears (Do not change)
Press SET to return to the vacuum display
Press SET- P_1 and 0.0 display alternates - Press and hold UP button to select -19.0
Press SET- P_2 and 0.0 display alternates - Press and hold UP button to select -19.0
Press SET- P_3 and 0.0 display alternates - Press and hold UP button to select -19.0
Press SET- P_4 and 0.0 display alternates - Press and hold UP button to select -19.0
Press SET to return to the vacuum display
*Note: To Zero-out the display, hold the UP and DOWN buttons at the same time.