
This document illustrates the steps necessary to properly install a new conveyor belt on a Park Industries Fastback machine.
Scan to Read on Device:

skill level

Estimated Time to complete: 3 – 4 hours
- Before installing the replacement belt, remove it from the box for a few hours prior to installation and lay it in the sun if possible. This will warm the belt making it more pliable which will aid in installation.
- Locate encoder wire connections in main electrical panel and take photos of connections. Remove wires to aid in encoder removal. If you have a Fastback II you will aslo have to remove the cable for the conveyor motor.
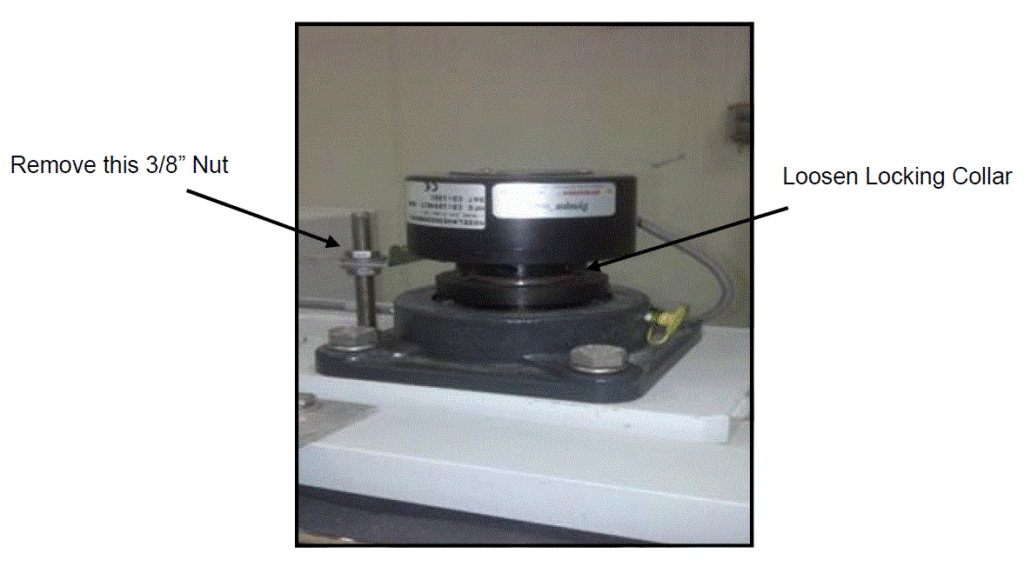
- Remove the encoder by loosening the locking collar securing the encoder to the drum shaft. Then remove the 3/8″ nut that secures the encoder mount tab to the machine. On older versions, there is a small cover that will need to be removed in order to access the locking collar. Remove the two (2) Phillips head screws, then remove the cover.
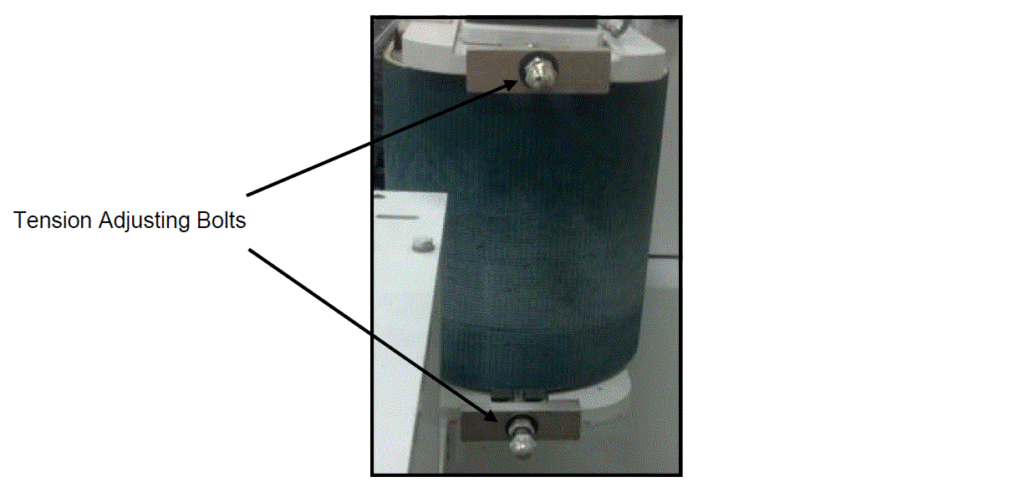
- Fully loosen the two (2) belt tension adjusting bolts on the end of the conveyor. Push the drum towards the conveyor (loosening the belt) until the drum is bottomed out against the frame.
- Remove the old belt from the machine. Starting on the away (discharge side), work the belt off of the drum and then over the ears of the frame. Note: If you have a Slaback you will need to remove the short horizontal roller bars to remove the belt.)
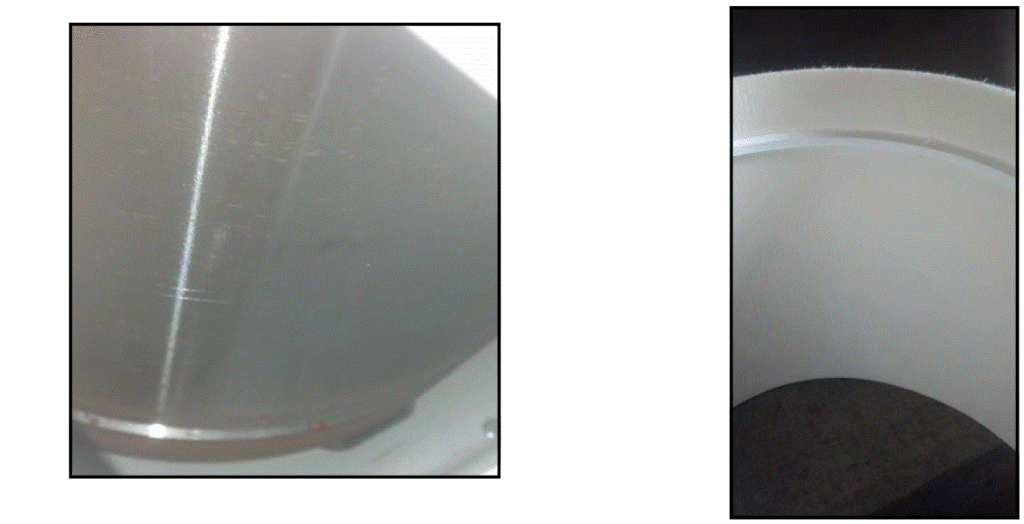
- Once the belt is removed, thoroughly clean the two (2) drive drums removing any rust or scale that has accumulated over time. Inspect and clean the alignment groove toward the bottom of the drums. The belt has a guide on it that runs in these grooves and any dirt or debris stuck in the groove could cause the belt to move at an inconsistent speed or cause a bulge.
- Install the new belt starting on the operator end. You will need to pry the belt over the ears on the conveyor frame using flat pry bars. Be careful not to damage the alignment lug on the inside of the belt.
- Once the belt is started on both drums, manually turn the drums while pushing down on the belt. This will guide the belt further onto the drums and into position.
- Align the belt so the lug on the inside of the belt matches the groove on the drums. Tighten the tension bolts at the end of the conveyor until the slack in the belt is taken up.
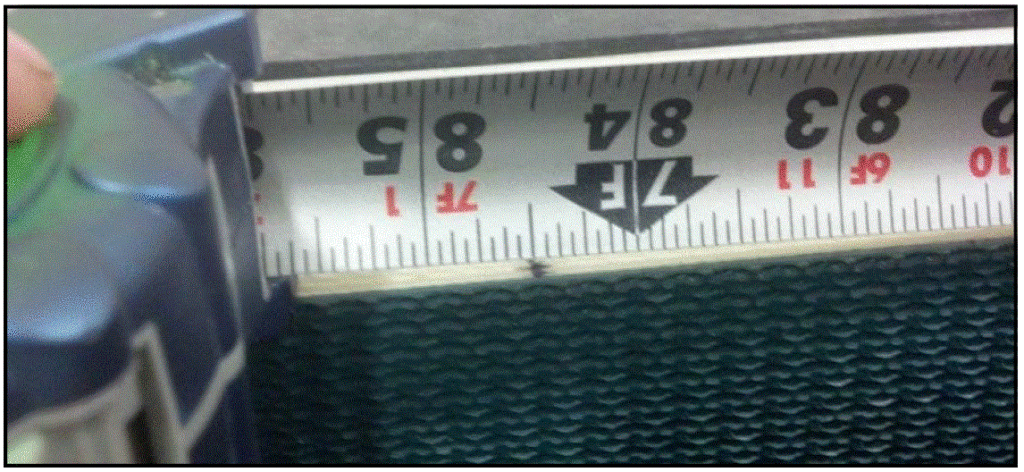
- Mark the top of the conveyor belt in two places exactly 7 feet apart. Use a carpenter’s square to mark the bottom of the belt directly below the two marks you just made on the top.
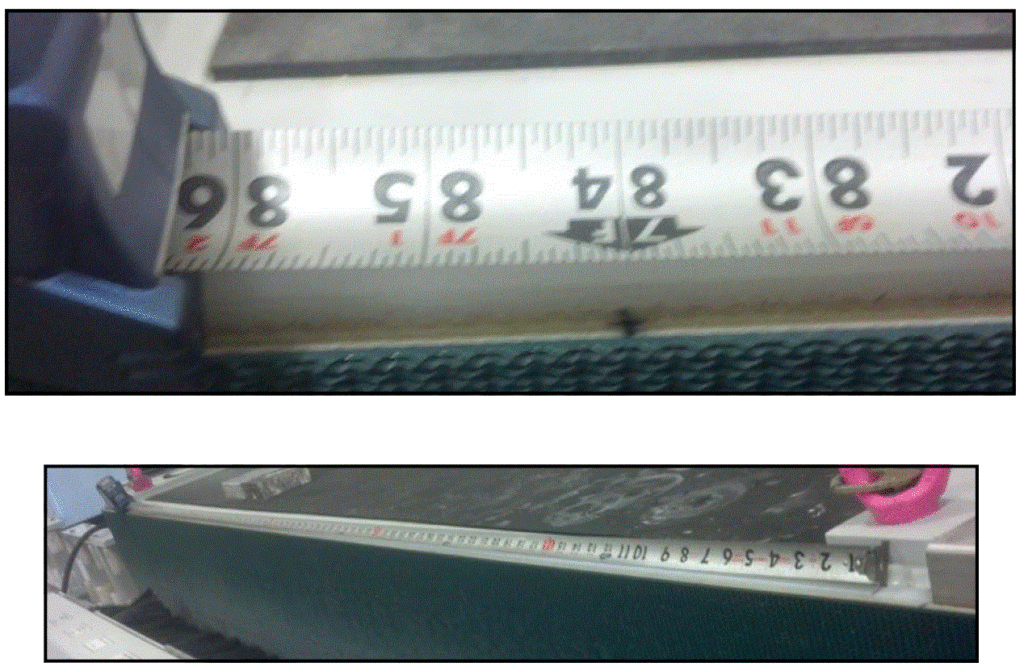
- Tighten the two (2) belt tension bolts evenly until the difference between the marks on the top of the belt reads 7′ – 5/8″. Check the distance between the two marks made on the bottom of the belt and verify the same 7- 5/8″ measurement.
- Re-install the conveyor encoder and wiring.
- Run the belt at 15% speed and monitor the belt to see if it is moving up or down on the outfeed drum. If the belt is dropping toward the floor on the outfeed drum tighten the top tensioner nut on the infeed drum. If the belt is rising on the outfeed drum then tighten the bottom tensioner nut on the infeed drum. Allow 5 minutes of runtime at this speed to ensure tracking.
- After getting the belt to track straight slowly increase the speed to 30%, 50% and then 100% while carefully monitoring the tracking and making adjustments along the way. When complete the belt should hug the drums and have no visible bulges.
- Re-calibrate the belt using the conveyor calibration procedure in your manual or in the Park Industries Service Guides.
- The belt will need to be tightened and re-calibrated after one week of running due to stretch. After the one week adjustment check the belt again after three weeks and adjust if necessary. Belt calibration should be performed if belt has to be re-tensioned.