
This guide will show you how to wire the new style hydraulic controller for a Pro Edge III that is wired from electrical print 49352. The hydraulic controller part number is 97499
Scan to View on Mobile Device

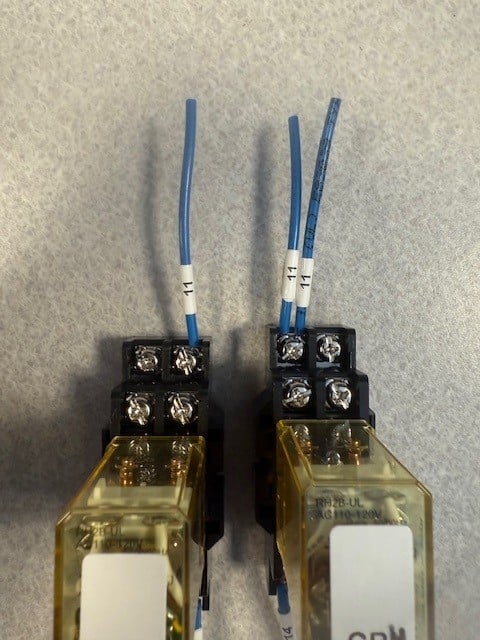
This is what your CR3 and CR4 will look like before do any wiring on the relays. This guide is just a mock up of how the wiring will look.
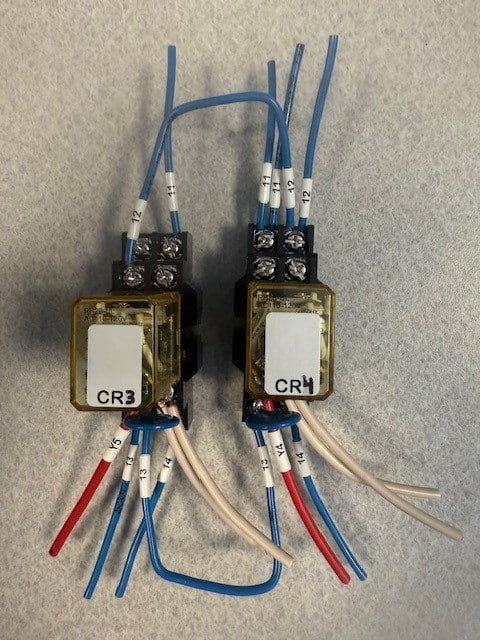
Top of Relays
Bottom of Relays

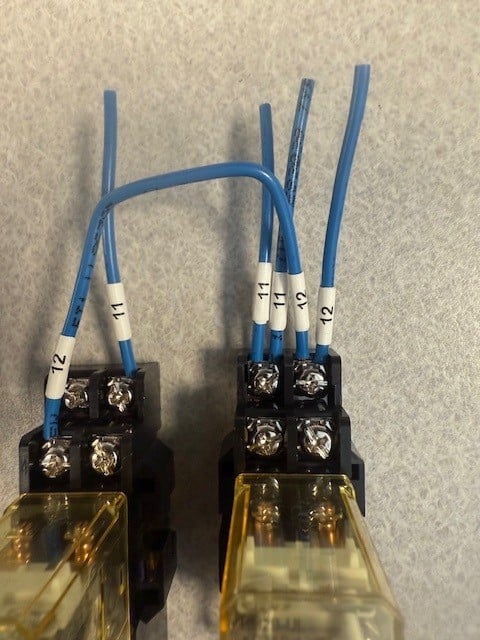
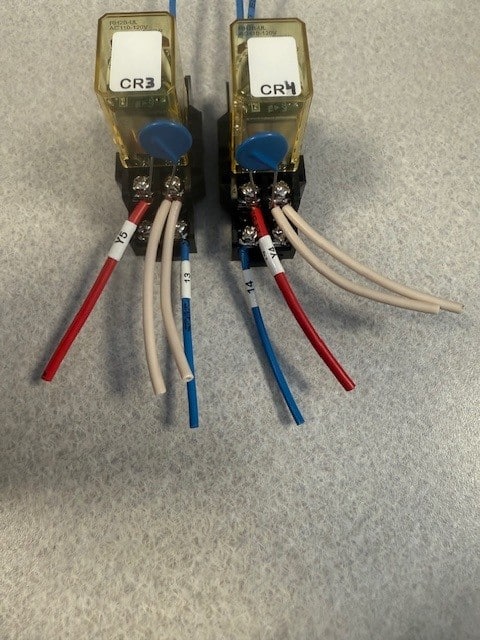
Here is the wiring on the top of CR3 and CR4 that needs to be changed. -The #12 wire that jumps from CR3 to CR4 marked in red can be removed -The #12 wire that is marked in yellow will be removed and ran to your new hydraulic card.

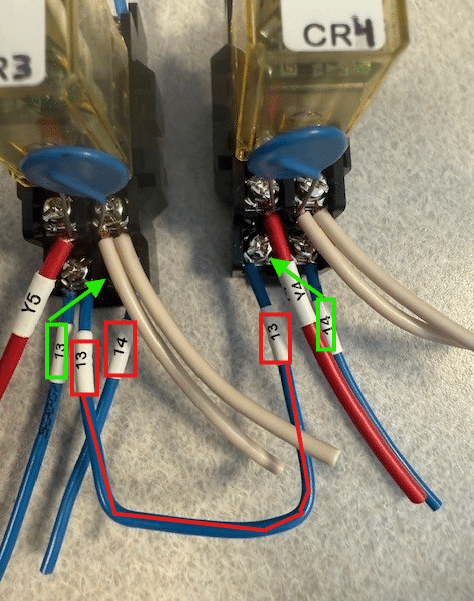
Here is the wiring on the bottom of CR3 and CR4 that needs to be changed -The #13 wire that jumps from CR3 to CR4 marked in red can be removed -The #14 wire in CR3 marked in red can be removed -The #13 wire on CR3 marked in green can be moved to the bottom right port on CR3 -The #14 wire on CR4 marked in green can be moved to the bottom left port on CR4
Here is what your relay wiring should look like after it is done
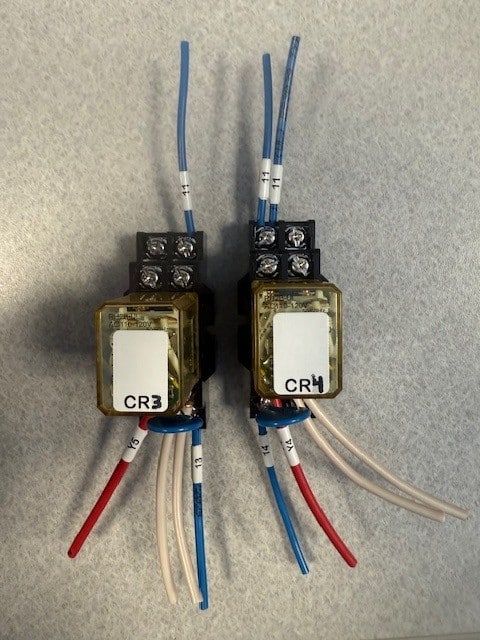
Top of Relays
Bottom of Relays
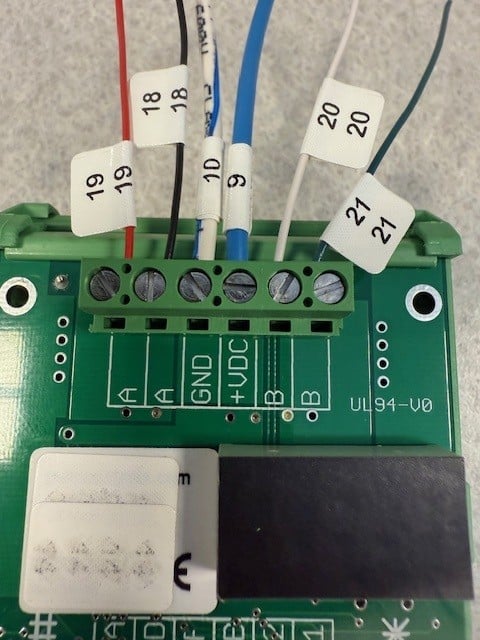
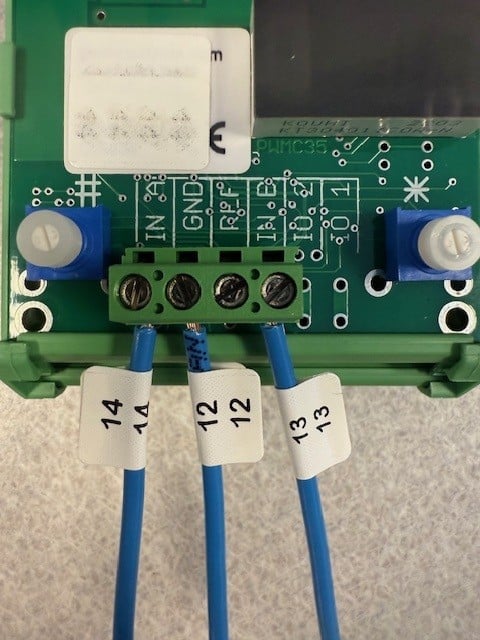
Your old card can be removed (make sure you can read all the wire numbers). You can mount the new card into place. Here is how the wiring should look on the new card. -The #12 wire will be the wire that you moved from the top of CR4. -All the other wires should be wires that came from your old card
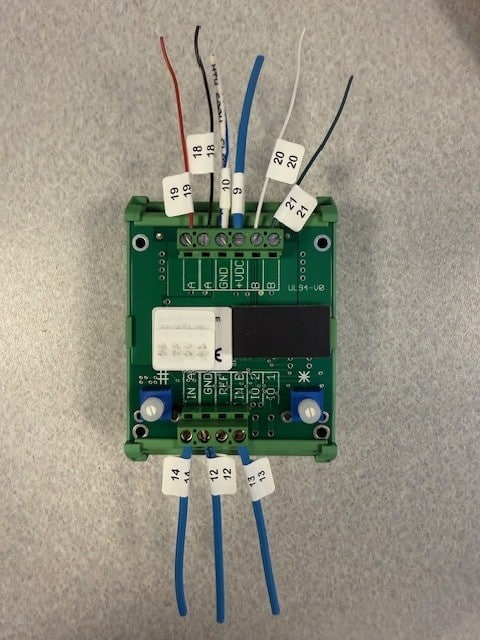
Top of Card
Bottom of Card
If you are confident that everything is correct, then you are good to run. All the cards are preprogrammed. If your speeds seem to be off then you can take a look at the links below to check your programming and how to tun it in if needed. Before adjusting any parameters be sure your bearings and rail are in good shape and clean