
This document illustrates the steps required to remove and replace the lower cross travel bearings on a Jaguar or Yukon saw.
Scan to Read on Device:


Component identification
Before You Start Component Identification:
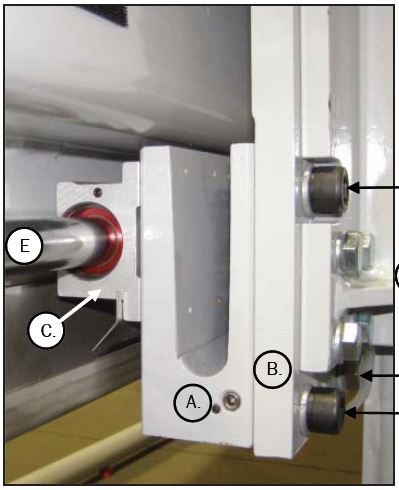
This photo identifies JAGUAR and YUKON bridge saw lower cross travel bearing components. The bearings ride on chrome round ways as the cross travel frame traverses the entire length of the bridge. The bearing is part of an assembly called a bearing block. The interface between the bearing block and cross travel frame is the bearing mount. Allen head bolts secure the block to the bearing mount. Allen head and/or hex head bolts secure the bearing mount to the cross travel frame.
A. Bearing Mount
B. Cross Travel Frame
C. Bearing
D .Mount to Frame Bolts
E. Round Way
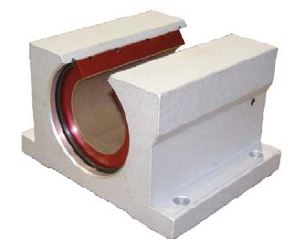
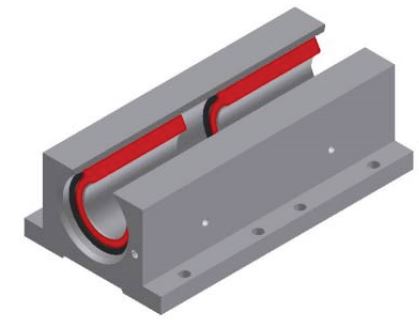
There are two bearing block versions: single and twin. The single style is found on YUKON and most JAGUAR models. The twin style is found on all JAGUAR III machines and is an option on other JAGUAR machine models.
There are two bearing block versions: single and twin. The single style is found on YUKON and most JAGUAR models. The twin style is found on all JAGUAR III machines and is an option on other JAGUAR machine models.
Before You Start
Common Tools:
a. Standard SAE box end wrench set
b. ½ or ⅜ inch SAE drive socket set
c. Allen wrench set (inch version)

- 1. Remove both Bridge shroud covers as follows:
- A. Recommend two people.
- B. Pull out at the bottom to release the lower Velcro strips and then push up to release the top strip.
- 2. Position the machine as follows:
- A. Move cross travel assembly close to the center of the Bridge.
- B. Move the arbor/Blade on the Z axis to the lowest position.
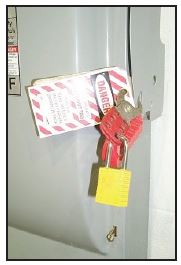
3. Turn Off Power at the Disconnect AC power to the machine. Follow the Lock Out/Tag Out procedures specified by your company.
4. Thoroughly clean the entire round way (end to end) especially the non-traveled portion of the way. If necessary, use emery cloth on the non-traveled portion to remove rust.
Special Tools:
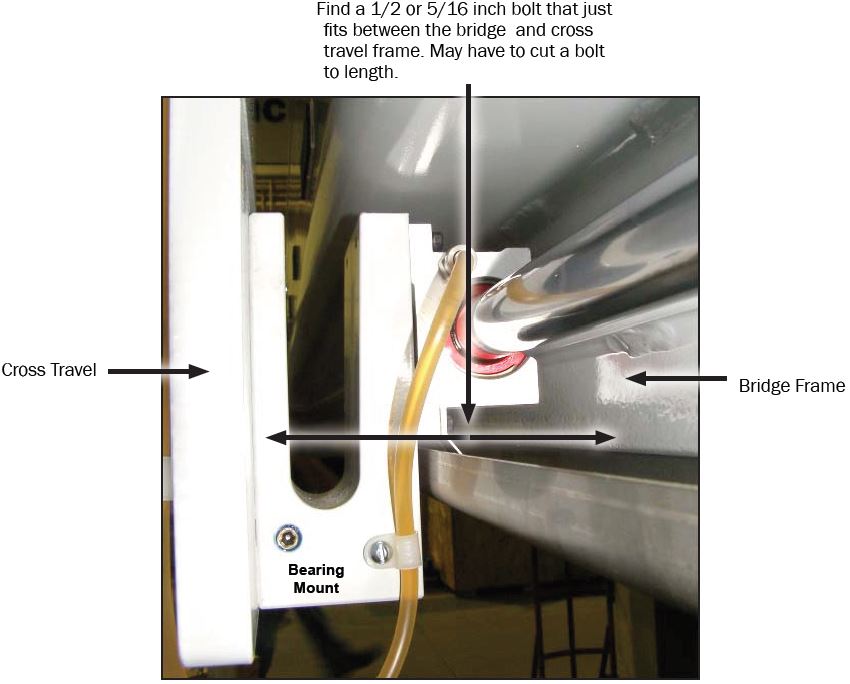
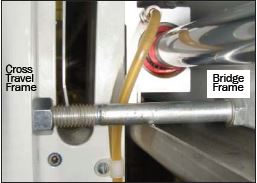
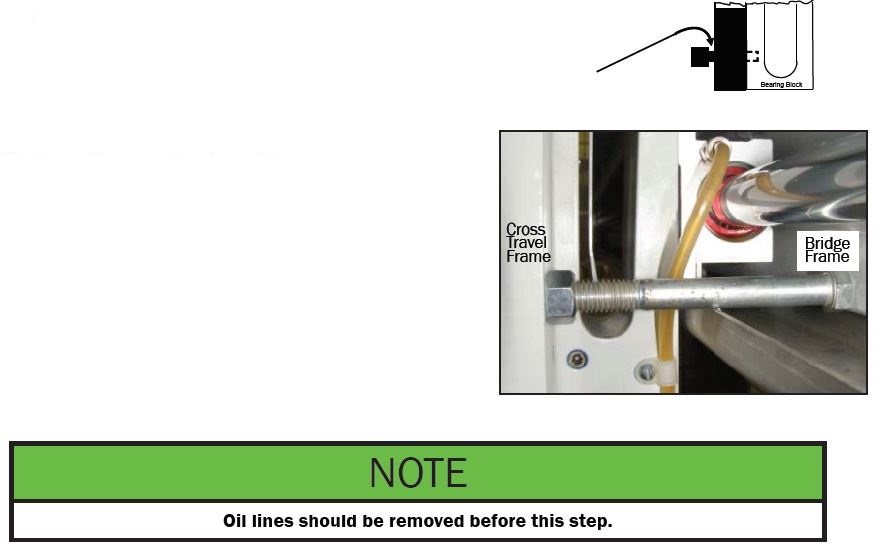
In order to remove the bearing mount, a very small gap must be created between the mount and cross travel frame. This is done by rotating the cross travel frame on the upper bearings. A port-a-power jack or a simple bolt and nut can be used. The below photo illustrates how to determine the correct length of the bolt.
5. Loosen but DO NOT REMOVE at this time the bolts on both lower bearing mounts.
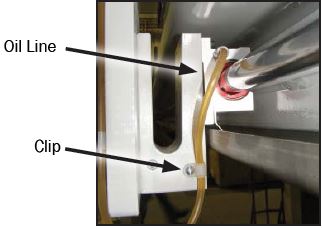
6. For each bearing, remove the oil line and then the plastic clip which secures the line to the bearing mounting block.
7. On one side only, remove the bearing as follows:
a. Remove the three bolts.
b. Place the spreader bolt with nut or a port-a-jack
between the bridge and cross travel frame.
c. Loosen the nut or expand the jack only enough to
free the bearing mount.
d. Slide the bearing mount to the end of the way
and then remove.

8. Install the new bearing block on the bearing mount as follows:
a. Remove the bolts which secure the block to the mount.
b. Clean the bearing mount assembly.
c. Place one or two drops of Loctite 243 (blue) or equivalent on each bolt.
d. Replace and then tighten the bolts in an alternating pattern to ensure uniform pressure and proper
alignment.
9. Thoroughly clean the area on the cross travel frame where the bearing mount is attached.
10. Install the bearing mount as follows:
a. Position bearing block/bearing mount assembly on the way.
b. Slide into place and align the bolt holes.
c. Place one or two drops of Loctite 243 (blue) or equivalent on each bolt.
d. Replace the bolts.
e. Once you have all bolts started, remove the spreader bolt.
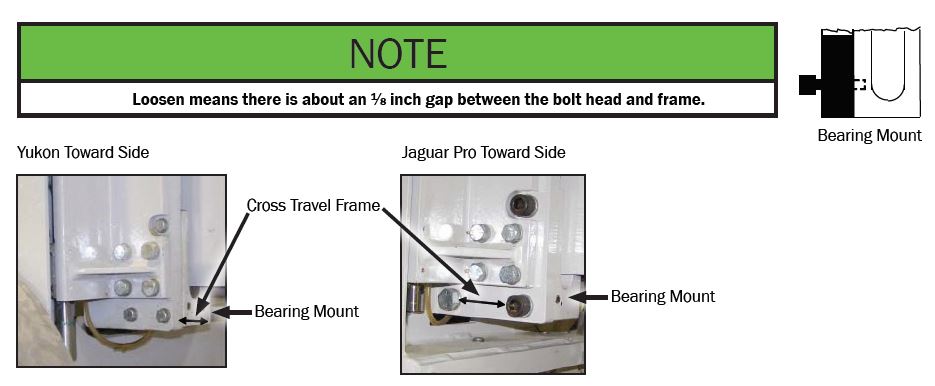
Continue to tighten the bolts but DO NOT COMPLETELY TIGHTEN.
Leave about an ⅛ inch gap between the bolt head and frame.
11. Remove the second bearing as follows:
a. Remove the three bolts.
b. Place the spreader bolt with nut or a port-a-power between the bridge and cross travel weldment.
c. Loosen the nut or expand the jack only enough to free the bearing mount.
d. Slide the bearing mount to the end of the way and then remove.
12.Install the new bearing block on the bearing mount as follows:
a.Remove the bolts which secure the block to the mount.
b.Clean the bearing mount assembly.
c.Place one or two drops of Loctite 243 (blue) or equivalent on each bolt.
d.Replace and then tighten the bolts in an alternating pattern to ensure uniform pressure and proper
alignment.
13.Thoroughly clean the area on the cross travel frame where the bearing mount is attached.
14.Reassemble as follows:
a.Position bearing block/bearing mount assembly on the way.
b.Slide into place and align the bolt holes.
c.Place one or two drops of Loctite 243 (blue) or equivalent on each bolt.
d.Replace the bolts.
e.Once you have all bolts started, remove the spreader bolt.
15. On both bearings mounts, tighten the bolts in an alternating pattern to ensure uniform pressure
and proper alignment.
16. Reconnect the oil lines.
17. Replace the bridge covers. Align and set the top Velcro strips first, then push on the front/bottom of the cover to set the lower Velcro strips.
18.Return the machine to operational status.