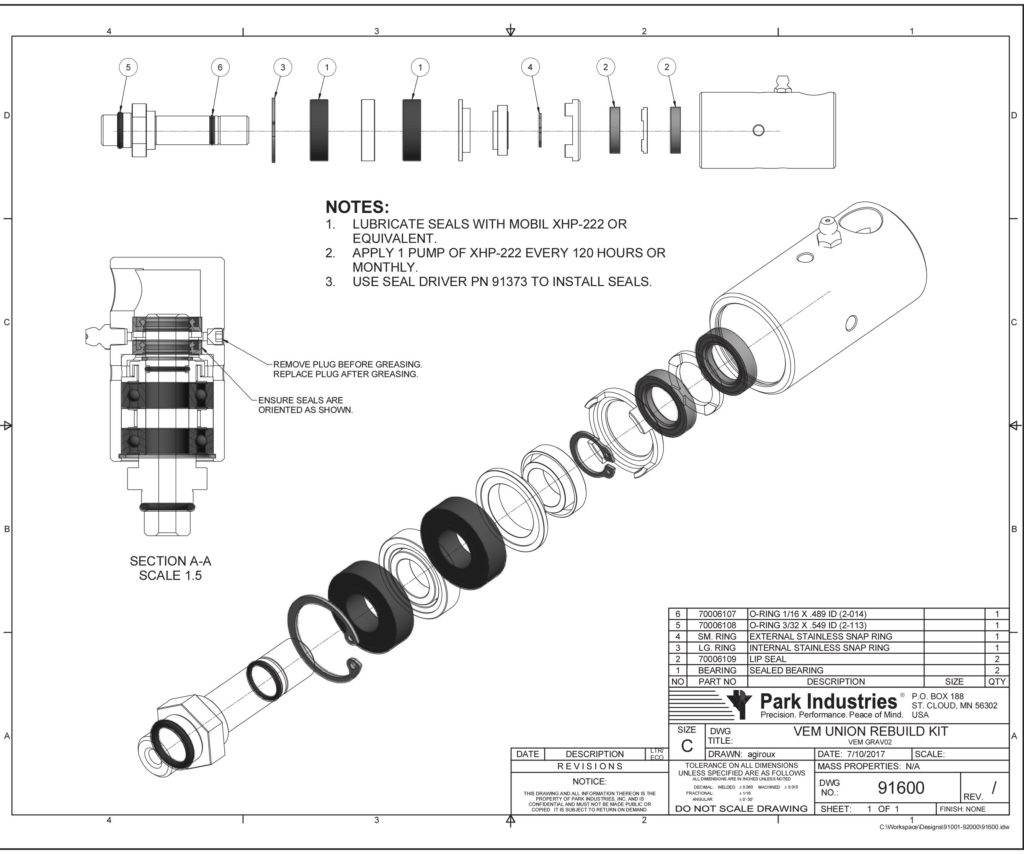
Guide will show you how to rebuild the water union step by step along with a video for demonstration purposes.
Tools you will need:
- Rubber Mallet
- Punch
- Snap Ring Pliers
- 90 ° pick or a Allen wrench and Vice Grip
- Small flat head screw driver
- Nylon Pad
- Seal Driver Tool Part Number 91373
- Rotary Union Seal Kit Part Number 91600

Remove the snap ring and secure the nut in a vice and lightly tap the water union housing off of the shaft. (Figure 1)

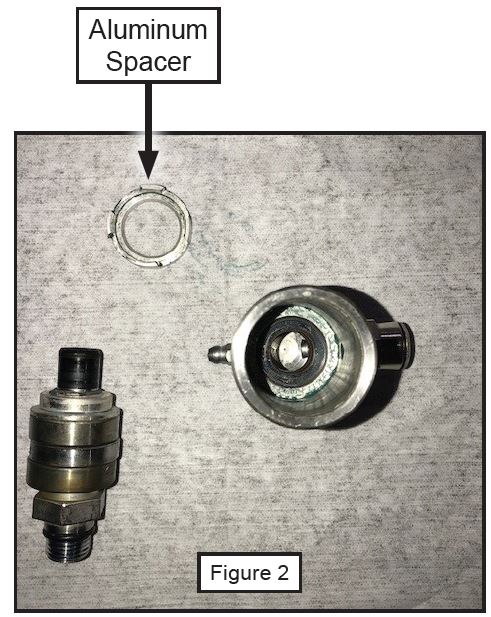
Remove the Aluminum spacer from water union housing. (Figure 2)
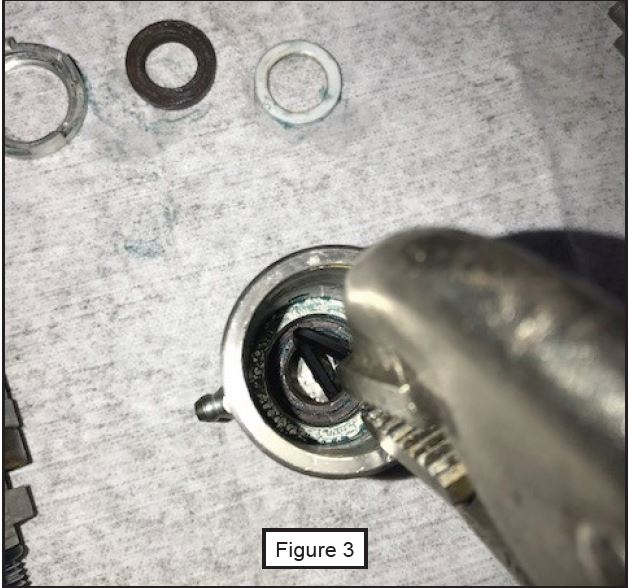
Use your 90 degree pick or vice grip with a hex wrench and pull the seals with the plastic spacer out. (Figure 3)
Place the first seal down in the water union housing. The side of the seal with the spring should be facing down (Toward top of Water Union). (Figure 4)

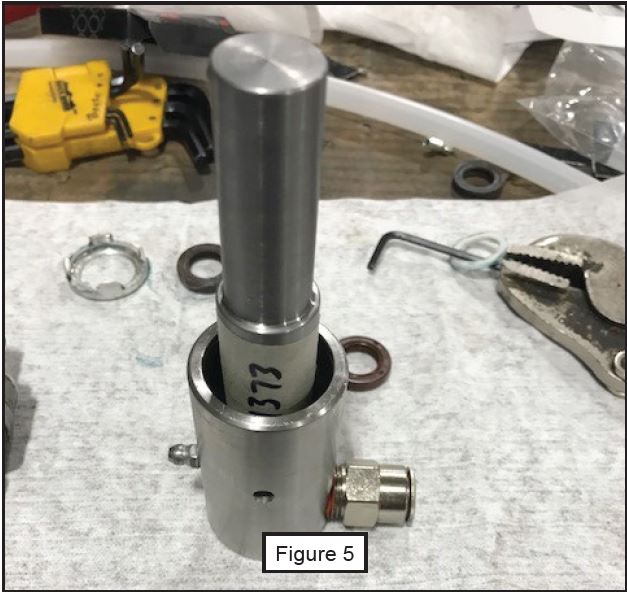
Use the seal driver tool to seat the first seal. (Figure 5)
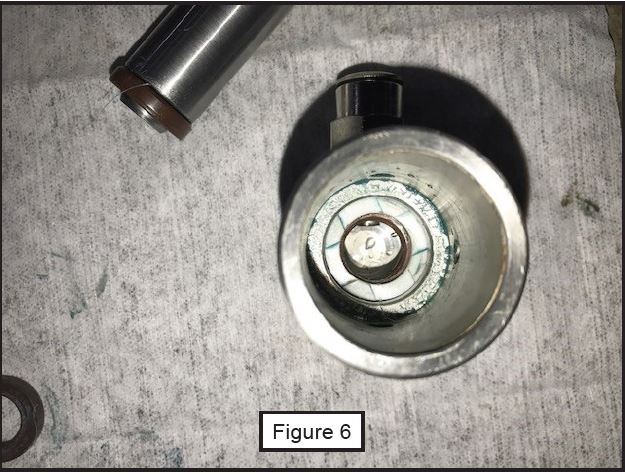
Insert the plastic spacer on top of the first seal. Be sure to have the raised sections facing up. (Figure 6)
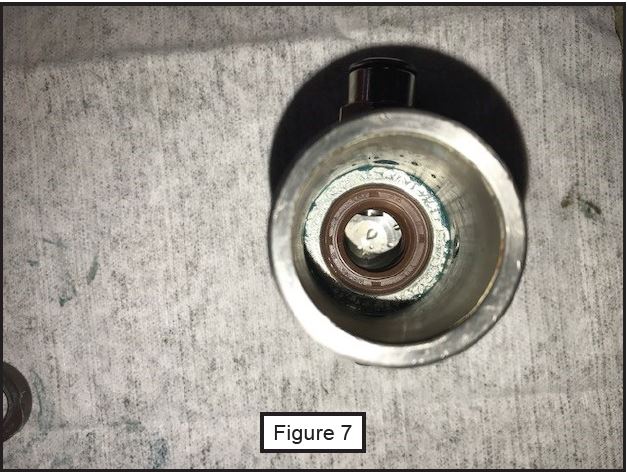
Insert the second seal using the seal driver tool to press into place. The seal should sit flush inside the water union housing. (Figure 7)
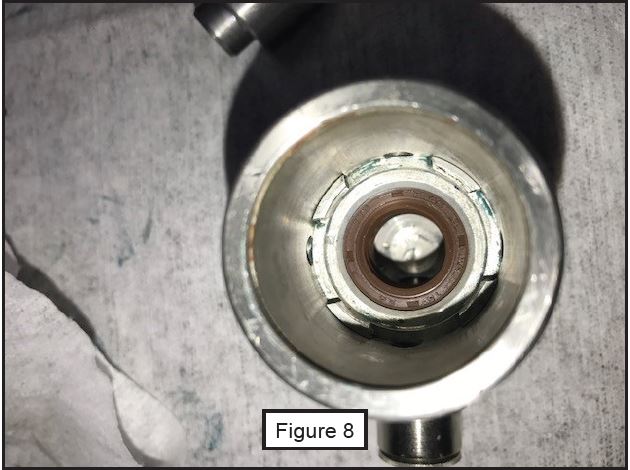
Insert the aluminum spacer down to the housing ridge. Be sure that non of the weep holes are covered by any of the flanges on the aluminum spacer. If they are spin the aluminum spacer until the weep holes are exposed. (Figure 8)
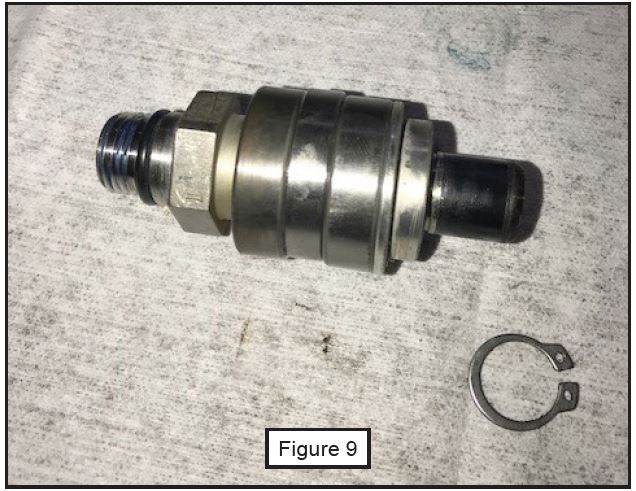
Remove the snap ring on the water union shaft (Figure 9)
Lightly clamp the bearings in a vise and lightly tap on the shaft to drive the shaft down through the bearings. (Figure 10) Keep track of how your spacers come off of your shaft.

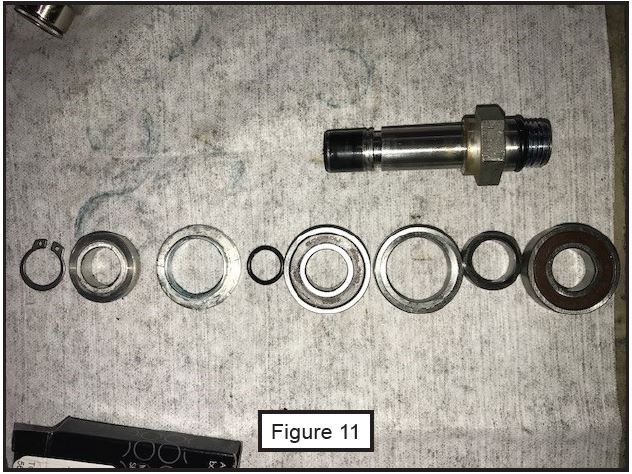
This will be everything off of your water union shaft. Use some scotch bright to clean up your water union shaft. (Figure 11)
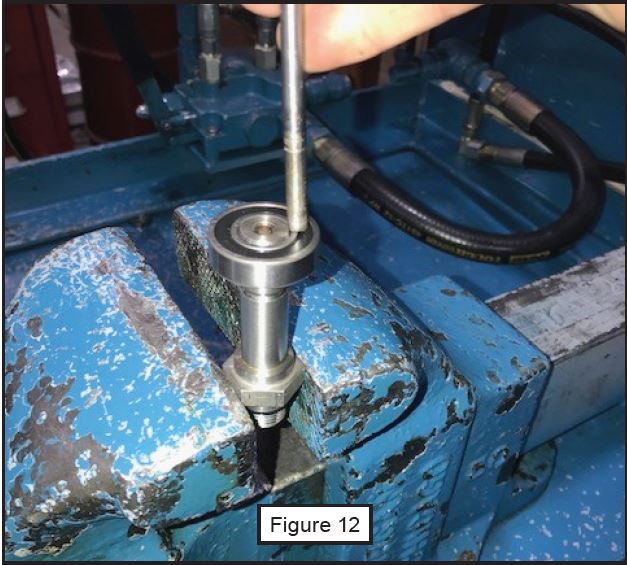
Lightly tap down the first bearing. Only tap on the inner bearing race. (Figure 12)
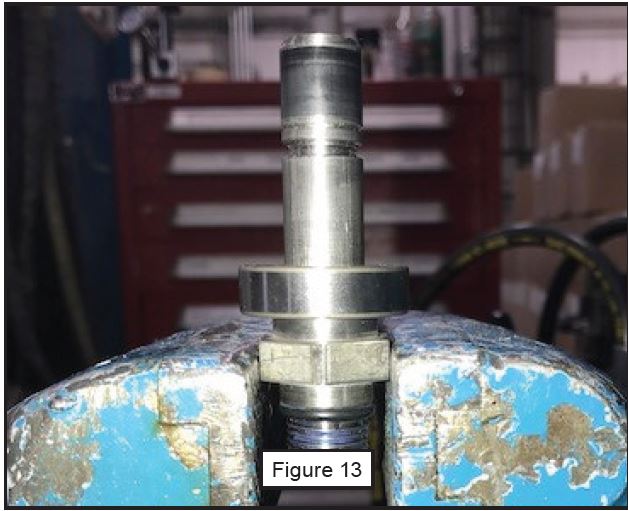
Be sure that the bearing is seated all the way down on to the water union shaft. (Figure 13)
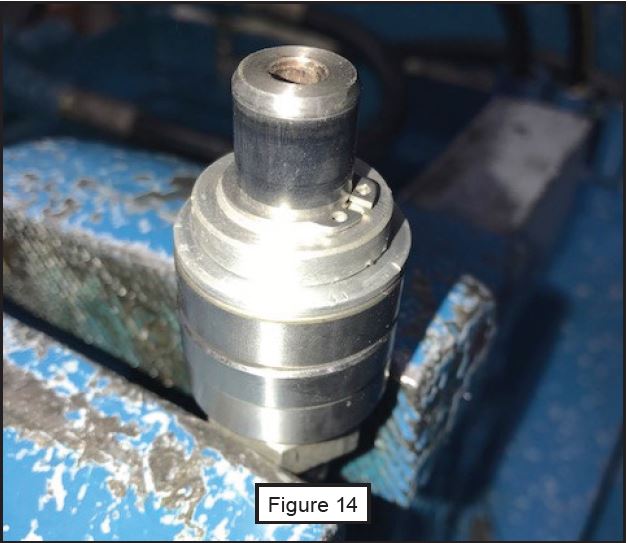
Reinstall the rest of the spacers and top bearing. Then replace the o ring and the 2 spacers on the top then the snap ring. Figure 14 shows a fully assembled shaft
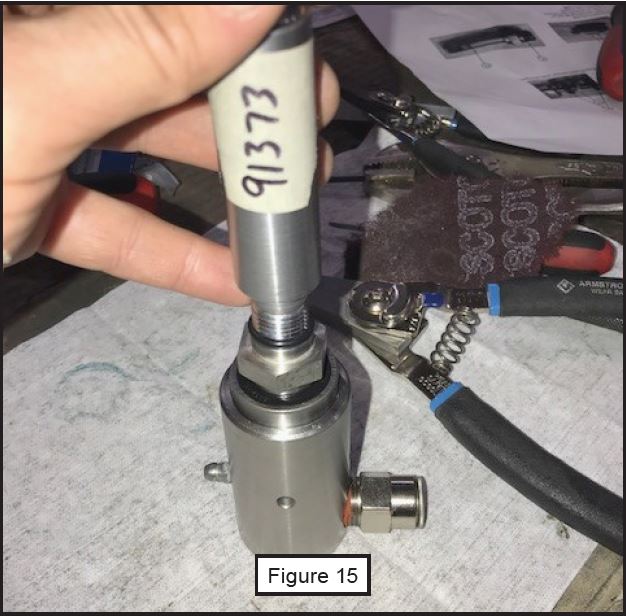
Use the spindle driver tool and rubber mallet to drive the water union shaft into the housing. (Figure 15)

Install the snap ring and replace the o ring below the threads on the spindle shaft. (Figure 16)
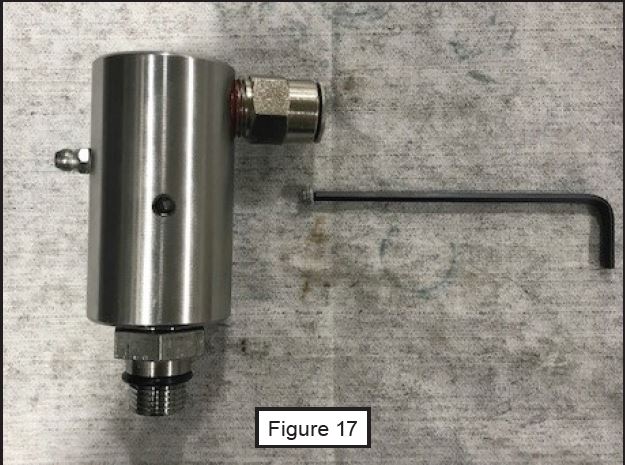
Remove the set screw and grease the water union with XHP-222 until grease comes out of the set screw hole and replace the set screw. (Figure 17) Reinstall water union on your machine.