
Replacing the Float Drain is simple and can be done with a minimum of tools. Care
should be taken when handling the Float Drain as it is plastic and comprised of many small parts
Scan to Read on Device:

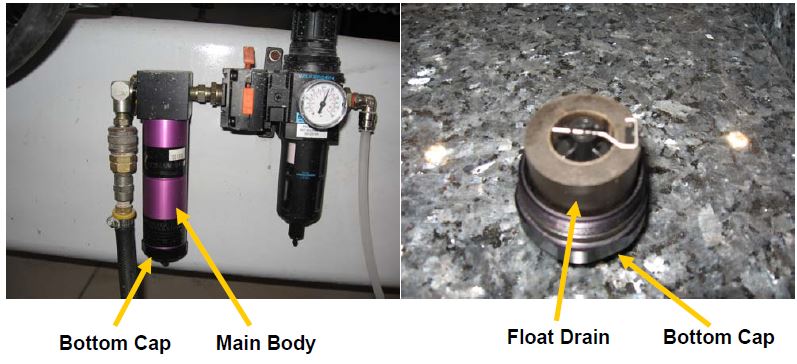
Locate the Tsunami for disassembly
Step 1) Remove the Bottom Cap from the Main Body. Grasp the main body with one hand and with the other hand turn the bottom cap counter clockwise. This will separate the Bottom Cap from the main body (the Float Drain is attached to the Bottom Cap)
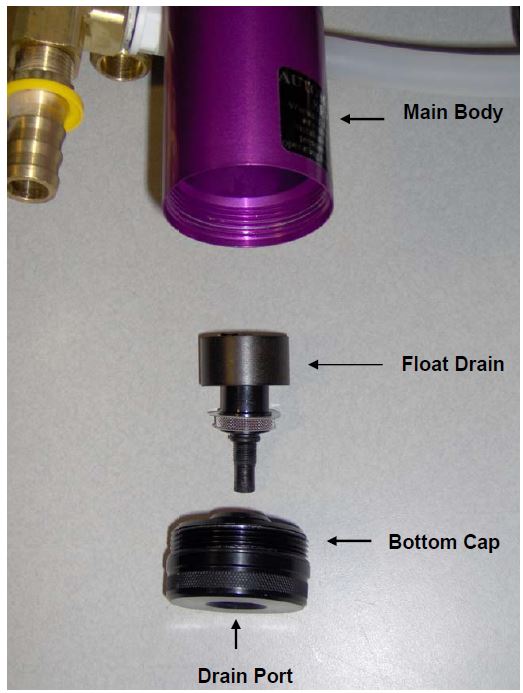
Locating the Float Drain Spout
Step 2) Locating the Float Drain Spout. Important: Do not attempt to unscrew
the Float Drain using the portion normally found inside the body. The Float
Drain extends through the Bottom Cap and emerges recessed in the 1/2” NPT drain
port. In this view you can see the plastic Spout shown inside the port. Turn the
Spout in order to get the Float Drain disassembled

Accessing the Float Drain
Step 3) Unscrew Float Drain. Using a tool (pliers) grasp the Spout and unscrew the Float Drain down into this side of the Bottom Cap. Turn to the right (clockwise) to loosen. Remove the old Float Drain and discard.
Install new parts
Step 4) Install New Float Drain. Grasp the new Float Drain firmly and start threading into the into the Bottom Cap. The O-ring on the Float Drain will snug inside the countersink of the Bottom Cap. Finger-tighten only. Then reinstall Bottom Cap to Body.
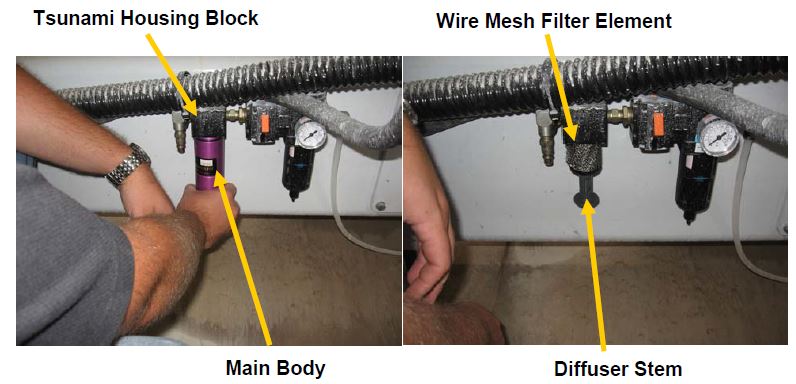
that is located inside the Main Body. To do this unscrew the Main Body counter
clockwise to remove it from the Tsunami Housing Block. The Wire Mesh Filter
is wrapped around a Diffuser Stem inside the Tsunami.
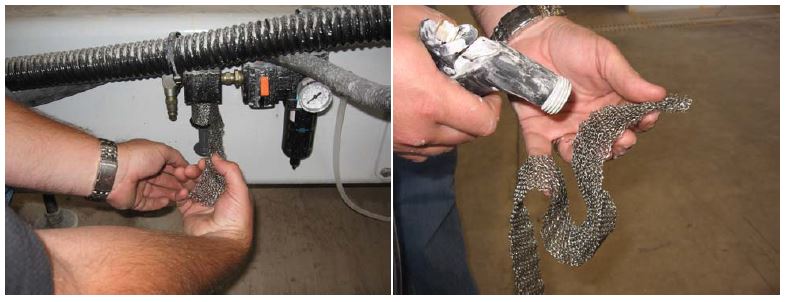
the reverse. Re-wind the filter element back onto the Diffuser Stem and screw
the Main Body back on to the Tsunami Housing Block.