
This document will show you how to setup the new X Axis motor in Sinumerik Operate.
Scan to Read on Device:


If not already open, open Sinumerik Operate on the Apex PC and turn system on.
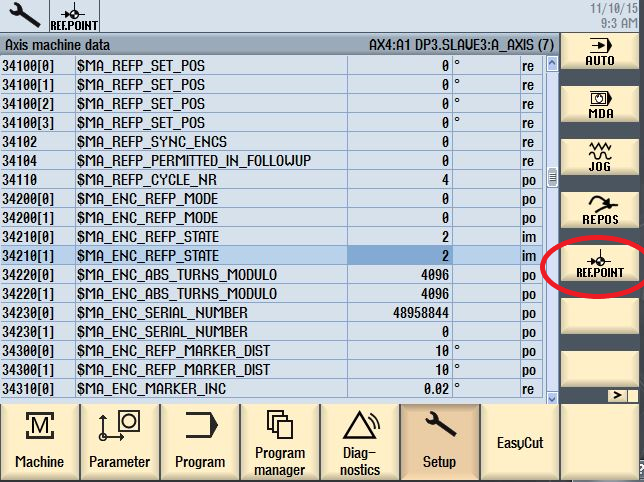
From the main menu press F10 on the keyboard to access the menu system on the bottom. Select Setup>Machine Data> Axis MD

In the upper right corner it will display the current axis. Use the Axis +/- button to change to X.

Click on “search” in the right side and search for 34210(0). It should be a 0 change it to 1.

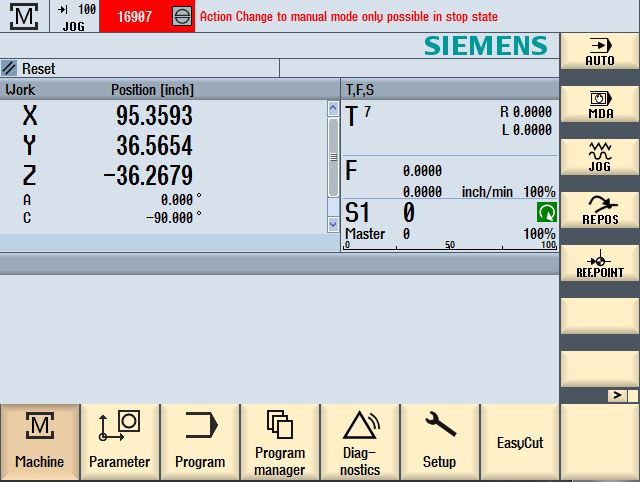
Make sure the pendant is turned on, verify the light is lit white in the top right corner on the main control panel.

Press F10 on the keyboard and select REFPOINT
On the pendant push the X minus button and on the screen the 1 we had earlier should change to a 2.

Press F10 to go back to the other menu and select Reset PO on the right side. Click yes twice to restart the system. Wait until reset in process is gone from the lower left corner of the screen.
Turn system back on and click on search, and find 36100. This is the soft limit for X axis negative. Record this value for later. Highlight and press enter and change to -150 and press enter.

Press Reset PO again and click yes twice. Wait until the reset in process is gone from the lower left corner on the screen.
Turn system on again and press F10 on key board. Click on Machine then press F10 again and click MDA.
Open tool rack cover by entering M102 Cycle Start then lower tool rack by entering M104 Cycle Start.

Now go and install the pointer tool in the spindle and the locating plug into tool position 1 on the tool rack. Take the pendant and line up the pointer tool to the locating plug.
Press F10 on keyboard and go to setup. Search 34210(0) the value should be a 2. Change it to a 1 click inside the box and press 1 then enter. Use the pendant and use the X minus button and now the value should change to 2. Push Reset PO and yes twice. Wait until the reset in process is gone in the lower left corner of the screen.
Press F10 and click on Parameters then User Variables and Global GUD.

Find TC_XPOS(1) this is the X axis location for tool1. Record this position (example 97.3392)
Press F10 on keyboard and click Machine, then MDA. In the MDA screen enter G0 and the position you just recorded with a minus in front of it (example G0 -97.3392) Set speed rate override down to 15% and push Cycle Start. The machine will move to this position.
Once Machine is positioned, Press F10 on keyboard and go to Setup and Search for 36100. Change the value back to the original recorded on step 9 (example -0.05)
Search for 34210(0) the value should be a 2, change it to 1. Make sure the pendant is on and active. Push the pendant X minus button and the 1 should change to a 2. Push Reset PO and push Yes twice.
Position the machine out of the tool rack area.
Press F10 on keyboard and click Machine, then MDA. In the MDA screen enter M103 Cycle Start to close tool cover and finally M105 to raise tool rack.