
The ZRS should be adjusted ONLY after the rise & fall ruler is properly zeroed. If the ruler has been previously checked and is OK then you can skip to “Checking the ZRS” at step 10. Required tools: metal ruler 12″, Flat Blade Screw Driver, Flat metal diamond tool (must be FLAT)
Scan to Read on Device:

Checking and Zeroing the Rise & Fall Ruler
With the Miter at 0°, Adjust the rise and fall so the pointer is pointing at “0”
checking the pointer
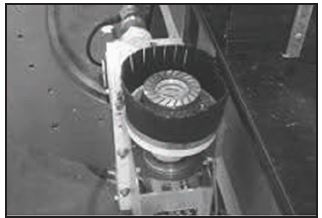
Place the Flat Edge Medium Diamond on the spindle and select “Spindle In”
Adjusting the hard stop

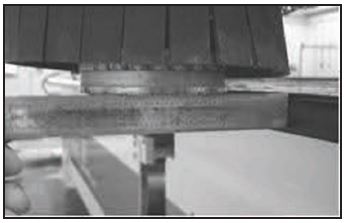
Adjust the hard stop so that the tool is flush with the top of the table
Is the tool still flush with Table Top
Move the Miter to 180°. The tool should still be flush with the table top. If it is you are done, the ruler is in the right place. If it is not continue to step 5
Fine Adjustments
Adjust the Rise & Fall until the tool is half the distance toward being flush. Example: If the tool is 1/2” below the table surface at 180°, adjust the Rise & Fall up so that the tool is only 1/4” below the table surface. The same is true if the tool is above the table except that you have to move the Rise & Fall downward
Move the Miter to 0°
Adjust the hard stop until the tool is again flush with the table top surface.
Adjust the hard stop until the tool is again flush with the table top surface.
Move the Miter to 180°
Is the Tool Flush?
If the tool is flush with the table top surface the Rise & Fall pointer should be adjusted with a
screwdriver so that the point is pointing at zero. If the tool is not flush repeat steps 5 – 9 until the tool is flush
Checking the ZRS

Required Tools
Metal Ruler
Tape Measure
Fine Diamond Tool
12″ Combination Square
1 Bring the Miter to ZERO
2 Place the position #2 diamond on the Spindle, and select “Spindle In”
Adjust Hardstop

Adjust the Hard Stop so the tool is flush with the table top surface
Move the MIter
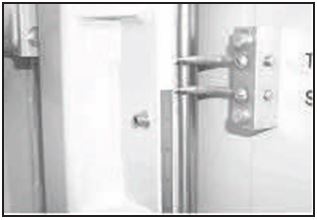
Move the Miter to the 90 degree position

Checking Measurement

Place the combination square on the table as shown and measure the distance from the tool to the edge of the table with a tape measure
Compare to ZRS tag
The measurement should be the same as the ZRS tag on the Rise and Fall. If not, write the new number down

Changing ZRS

Go to the main screen in the PE3 or PE4 touchscreen press machine setup (Screens will be similar on the PE3 or PE4)
Initial Setup Screen
On the lower left, press “Initial Setup”

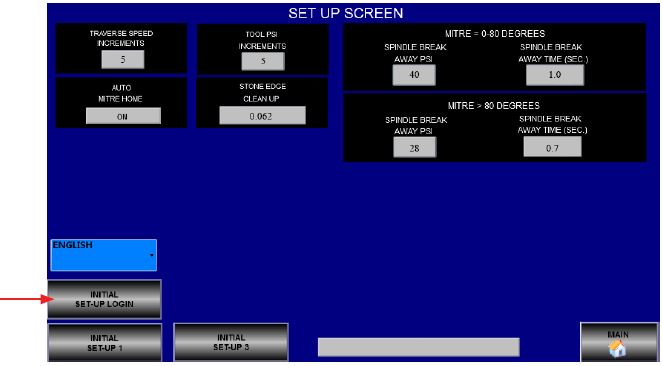
You will need to enter a password (“krap” or “sunrise”)
Enter the ZRS # that you wrote down and enter it in the Zero Radius Setting
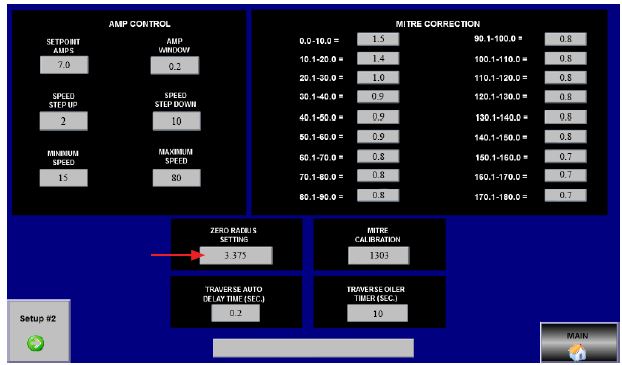
Now when you run a program the machine will add the correct ZRS setting for your machine