Are the SL GREEN laser lines less intense and faded looking? Follow the steps outlined here to clean the glass to allow the laser to project more efficiently.
Scan to Read on Device:

Use the safest method available to lower the laser to a comfortable working height. Make sure Power is disconnected from Projector
Make sure the power is disconnected from the projector. Then remove the cover from the projector.
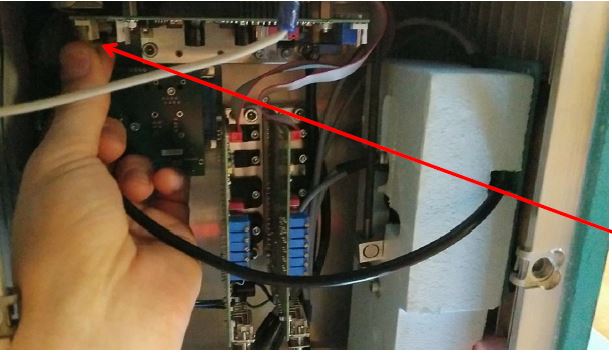
Once the cover is removed unplug the cable for the reflector board.
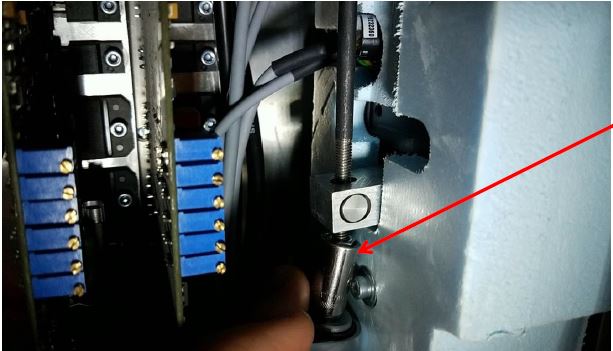
Using a 4mm allen key on top, and a 5/16” socket below, remove the nut on the bottom of the focus rod. Then completely remove the focus rod by loosening it from the top with the 4mm allen key.
Remove the 3mm allen screw that keeps the foam in place, then remove the foam.
You may find it easier to remove the foam if you remove the 4mm allen bolts holding the galvo boards in place (not pictured).
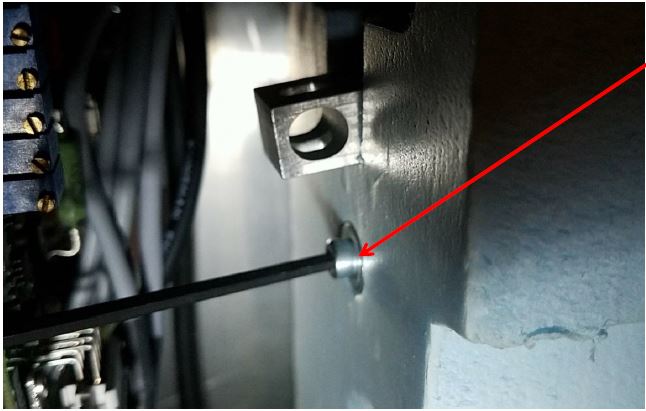
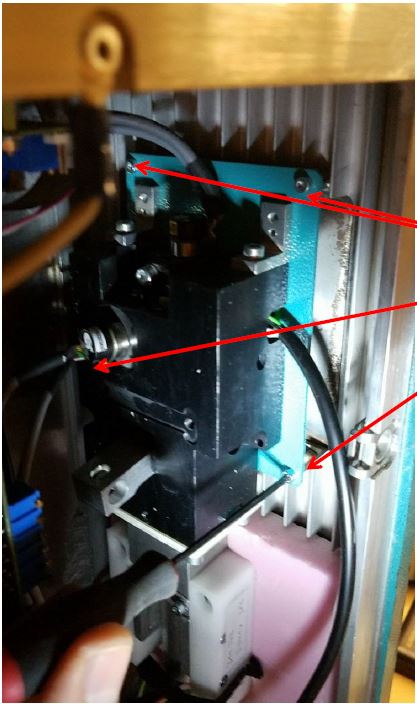
Remove the four 2.5mm allen bolts holding the mounting plate to the case. The two in the far back can be tricky, you may need to use a smaller allen key on these.
Again, removing the mounting bolts for the galvo boards gives you more room to work.
Gently pull the galvo block assembly away from the front of the case, and pivot so you can see the front. Be cautious not to pull too hard on any of the cables still connected.
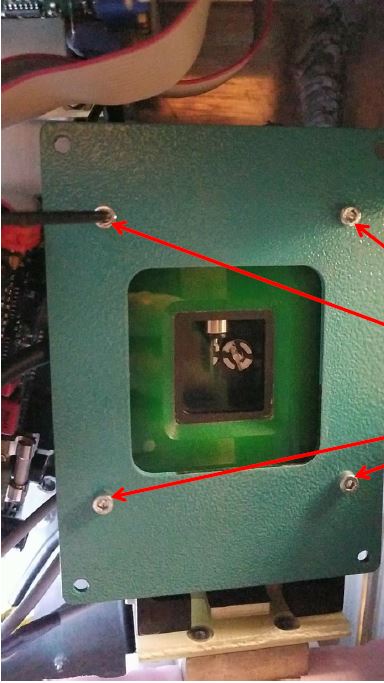
Remove the four 2.5mm allen bolts holding the mounting plate to the galvo block assembly.
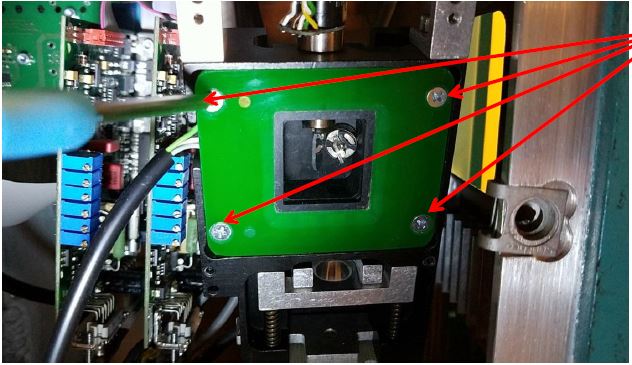
Remove the four phillips screws holding the reflector board.
Carefully remove the reflector board. There are a few layers sandwiched together on top of the actual board. These should be carefully pulled apart and cleaned.
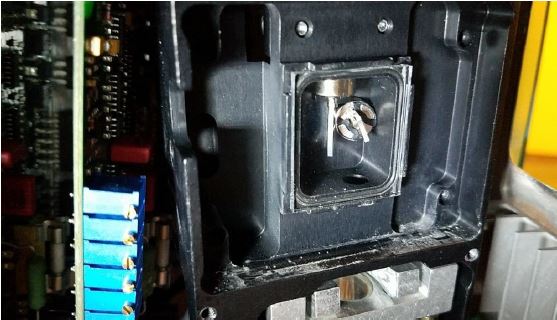
Once the reflector board assemblyis freed, there is nothing physically holding the glass window in place.
The glass piece *usually* stays in place until you carefully pry it out. Do not use any metal pieces or it will chip the glass.
Clean the glass with glass cleaner, then put back in place and hold with your finger while you put the reflector board assembly over and around the glass.
Installation of the rest is the inverse of removal.
The final step is to boot up the projector and adjust the focus rod from the top of the unit with a 4mm allen key. You want crisp lines being projected – no halos.