This document will guide in taking excessive play out of the miter box on the C arm.
Scan to Read on Device:

- Check the miter box for free play at 0 degrees by pushing and pulling on the hydraulic miter motor towards and away from the machine.
- Remove the silicone in the allen screw holes on the top plate of the miter box.
- Remove the outer allen bolts from the miter box with the 5/16″ allen wrench (there will be two sets of allen screws in each hole, one deeper that the other). Remove the two screws. Apply PTFE Teflon pipe sealant to the threaded holes and the four allen screws. Re-install one screw in each hole.
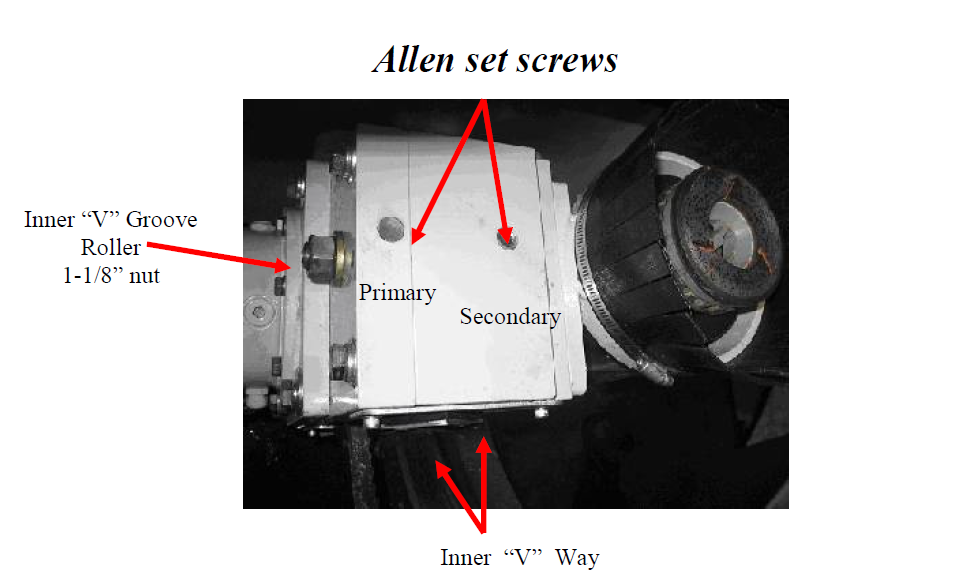
- Loosen the 1 1/8″ nut for the inner v groove roller 1/4 turn. The nut is located on the side of the miter box. (See image below).
- Miter up to 170 degrees.
- Tighten the primary set screw. Approximately 15-20 ft lbs.
- Miter down to 10 degrees. Put allen wrench in the end of the inner roller and hole it while tightening the 1 1/8″ nut.
- Apply a light film of grease or oil to the inner “V” surfaces of the C arm.
- Adjust the secondary set screw in small increments until the contact pattern is even on both sides of the inner way surface of the C arm. Repeat step #1. The free play should be minimal at both locations.
- Install the outer allen screws in both the primary and secondary holes. Cover with silicone.