
This guide is intended to remedy vacuum issues at -19 in/Hg or less. Before starting troubleshooting, make sure these conditions are made:
• Stone is in place on vacuum pods and in position on table
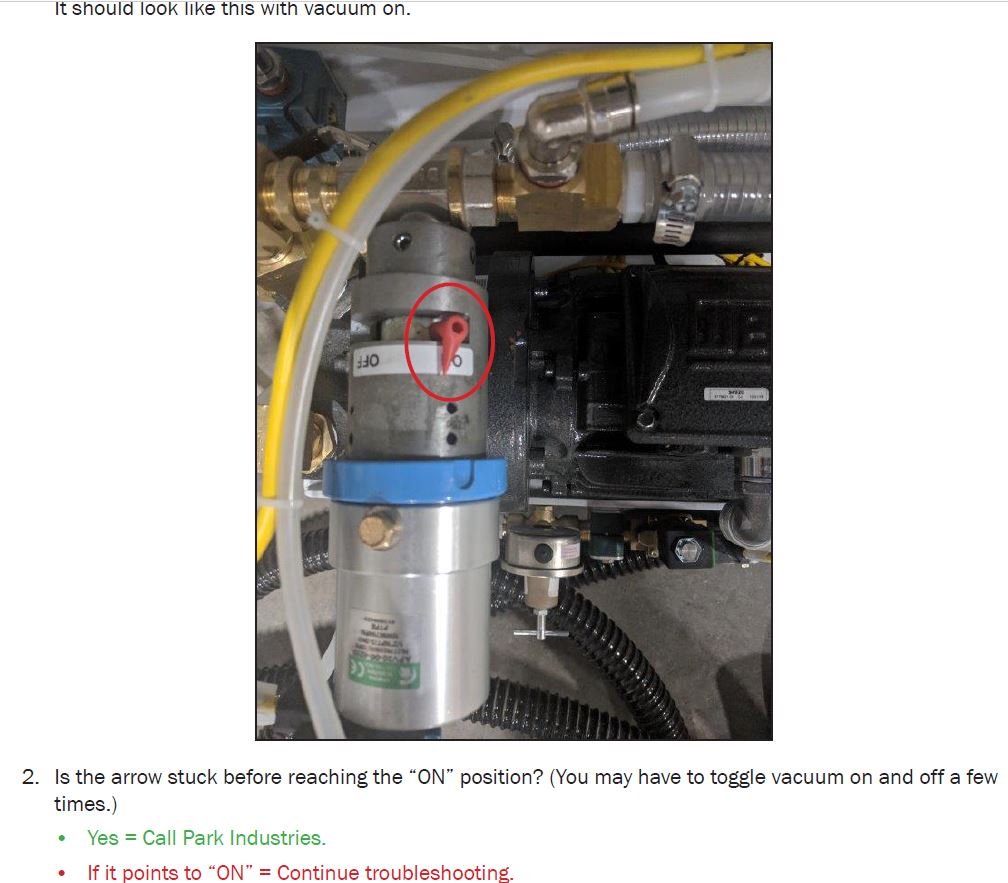
• Vacuum Pump is ON
• Verify that all appropriate manifold valves are on
Scan to Read on Device:

Initial conditions
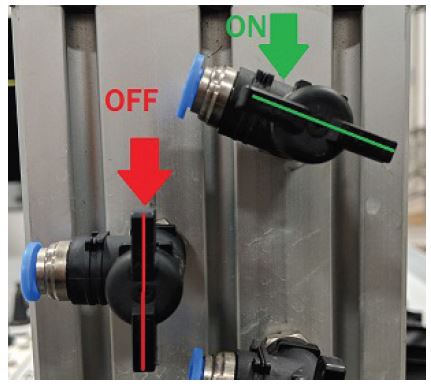
Verify manifold valves are in the correct position
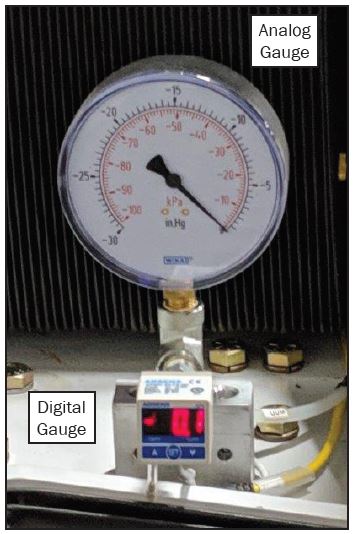
Both gauges, digital and analog equally read below -19 in/Hg if the conditions are made continue with this guide .
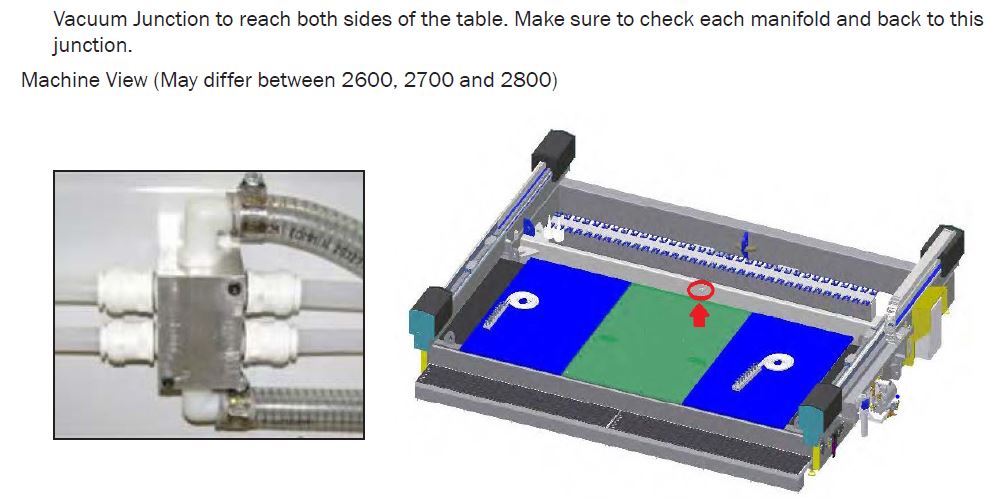
System overview
and function of the system. Continue following this guide for further troubleshooting.
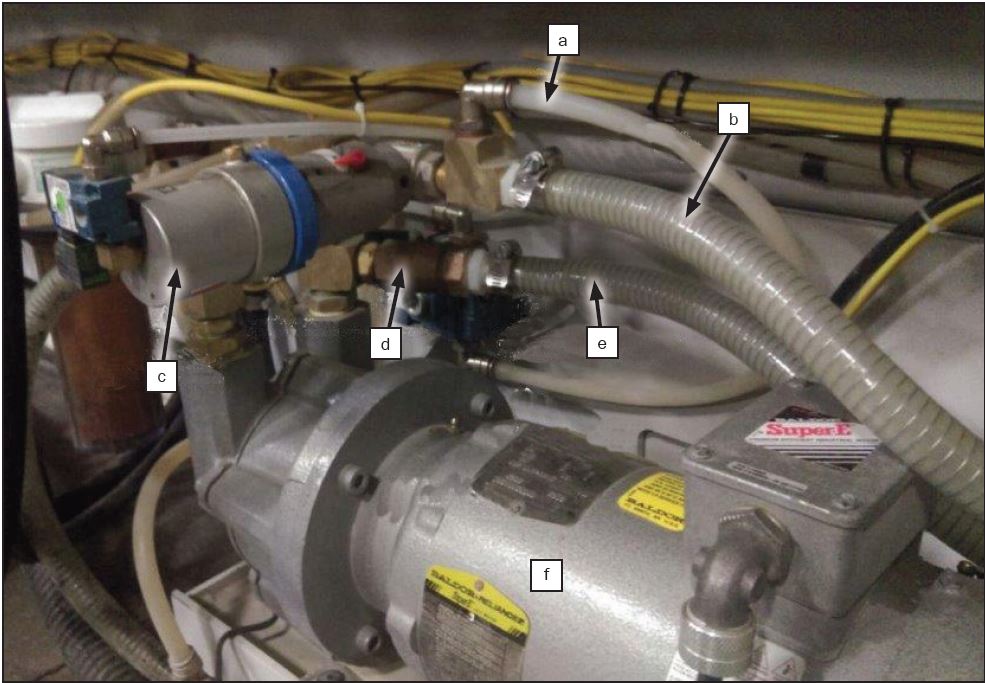
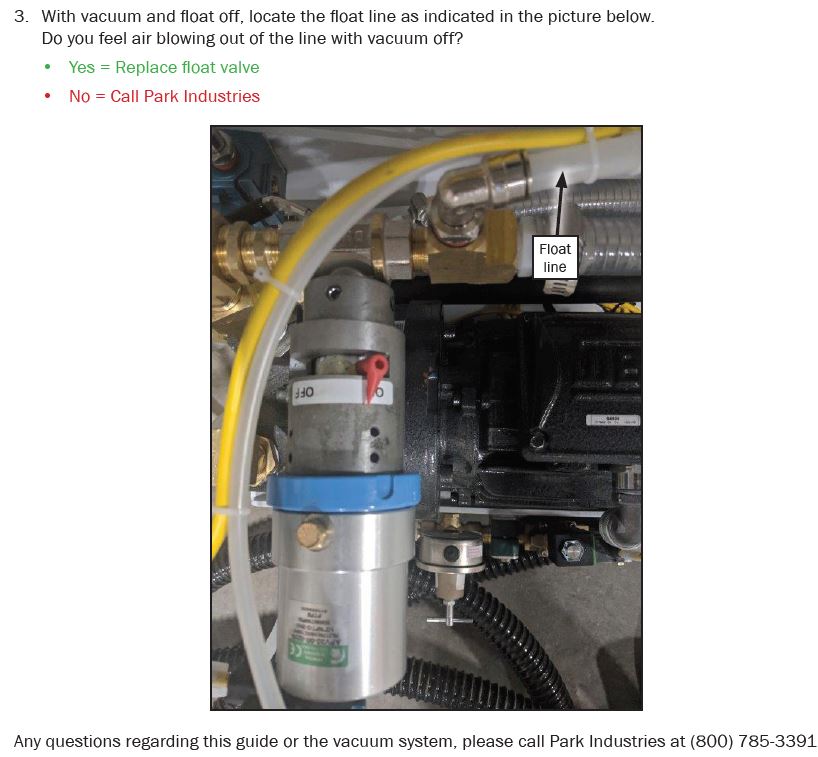
a. Float line – Air enters here when float is turned on.
b. Vacuum – Top side of cups. Runs under base to junction by tool rack. Has vacuum when pump is turned on, blows air when float is turned on.
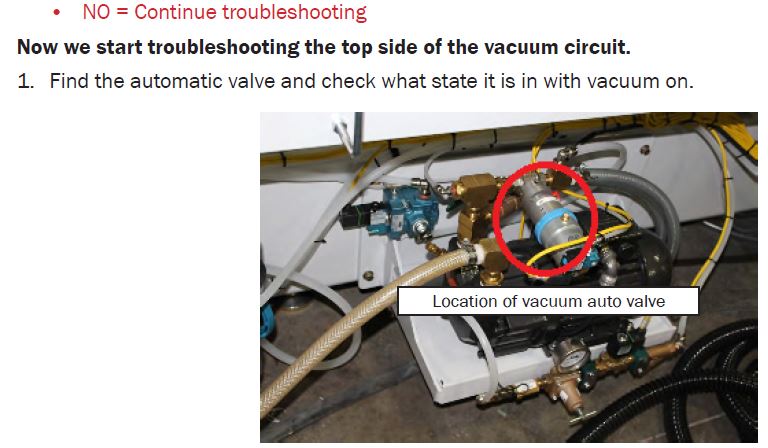
c. Spartan Ball Valve – On when vacuum pump is on, shifts to off when float is turned on. PN# 70000603
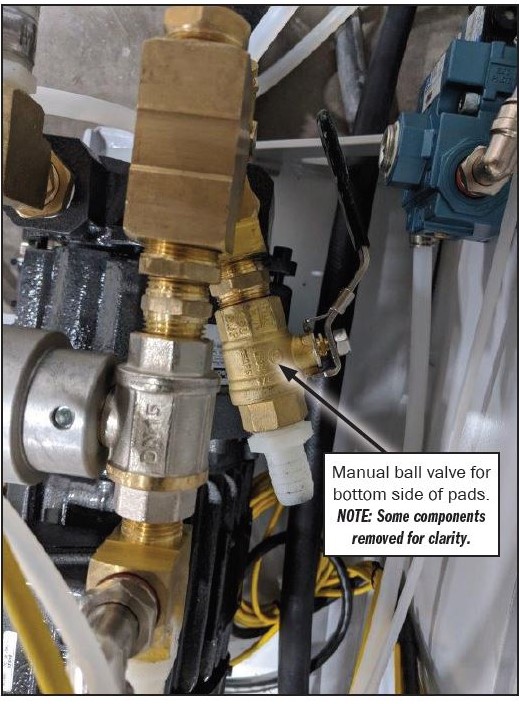
d. Manual Ball Valve – Shuts off vacuum to bottom side of cups
e. Vacuum – Bottom side of cups. Runs under base to junction by tool rack. Always has vacuum when pump is on.
f. Vacuum Pump PN# 70000135
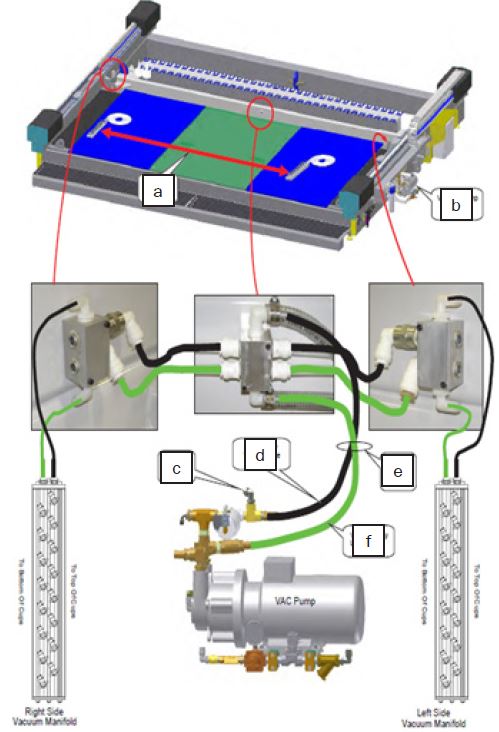
a. Vacuum manifolds.
b. Vacuum pump location
c. From air value.
d. Pressure or vacuum line.
e. Lines run under frame.
f. Vacuum only line.
TROUBLESHOOTING STEPS BEGIN ON THE NEXT PAGE.
Troubleshooting Steps

It is very important to follow the order of troubleshooting in order to end with the desired results
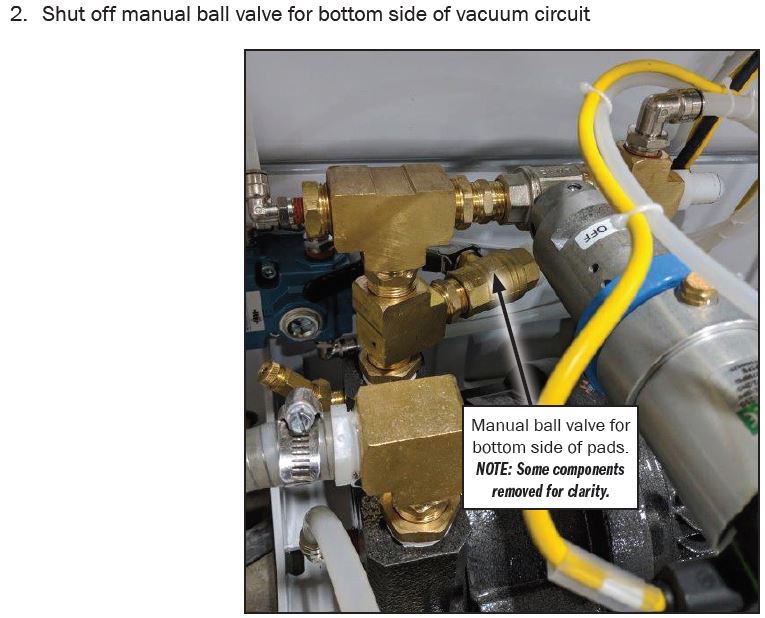
Shut off manual ball valve for bottom side of vacuum circuit
3. Does vacuum increase above -19 in/hg?
• YES = There is a leak between the vacuum pump and manifold
Possible Alarms are:
700041 – Low Vacuum Warning – Material Vacuum
700033 – Low Vacuum Warning – Main Vacuum
700034 – Warning – Vacuum at Marginal Level
700035 – Warning – Vacuum at Critical Low Level
700036 – NC Cycle Stopped – Vacuum at Critical Low Level